Your cart is currently empty!
NA Miata Valve Cover Gasket Replacement
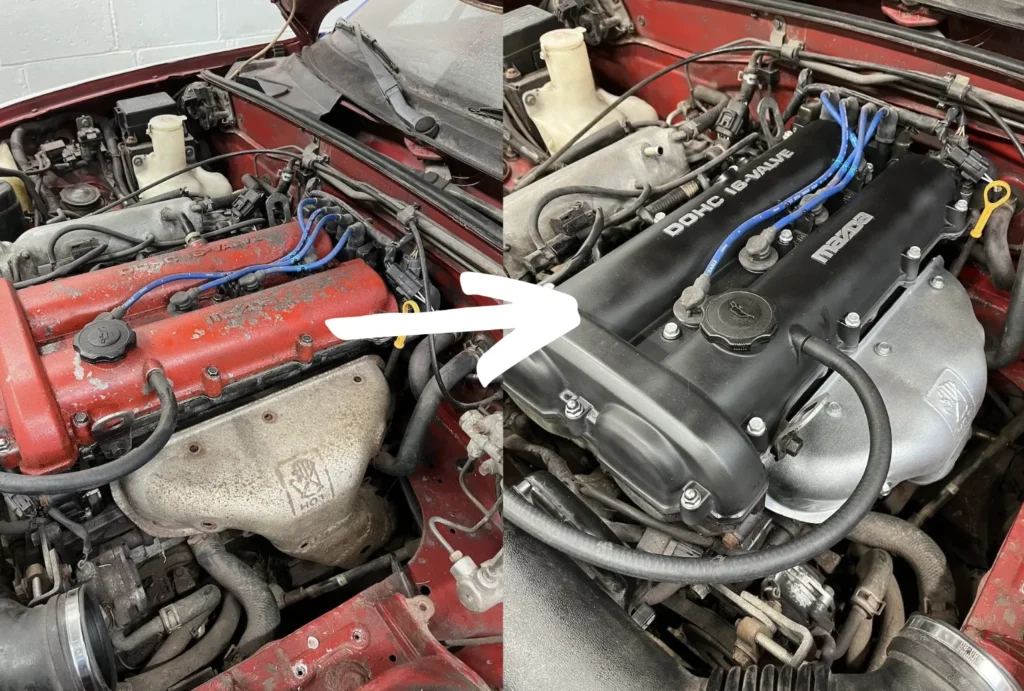
This guide will walk you through the process of NA Miata valve cover gasket replacement.
The valve cover gasket is one of the most common sources of oil leaks on the NA Miata. In the event that it is leaking on the driver’s side, this can also lead to smoking / burning smells as hot oil drips on to the exhaust manifold. Fortunately this is a very easy and beginner-friendly repair to tackle yourself!
| Estimated Mechanic Cost (Parts + Labor) | Parts Cost | DIY Savings |
| $225 | $25 | $200 |
Tools Required:
- 10 mm socket and socket wrench
- 12 mm wrench
- hose clamp pliers
- gasket maker
Parts Required:
Instructions:
- There are 2 breather hoses attached to the valve cover, one on the drivers side that connects to the intake crossover tube, and one on the passengers side with the PCV valve. Using hose clamp pliers if necessary, squeeze the hose clamp, and wiggle each of these hoses off the valve cover.
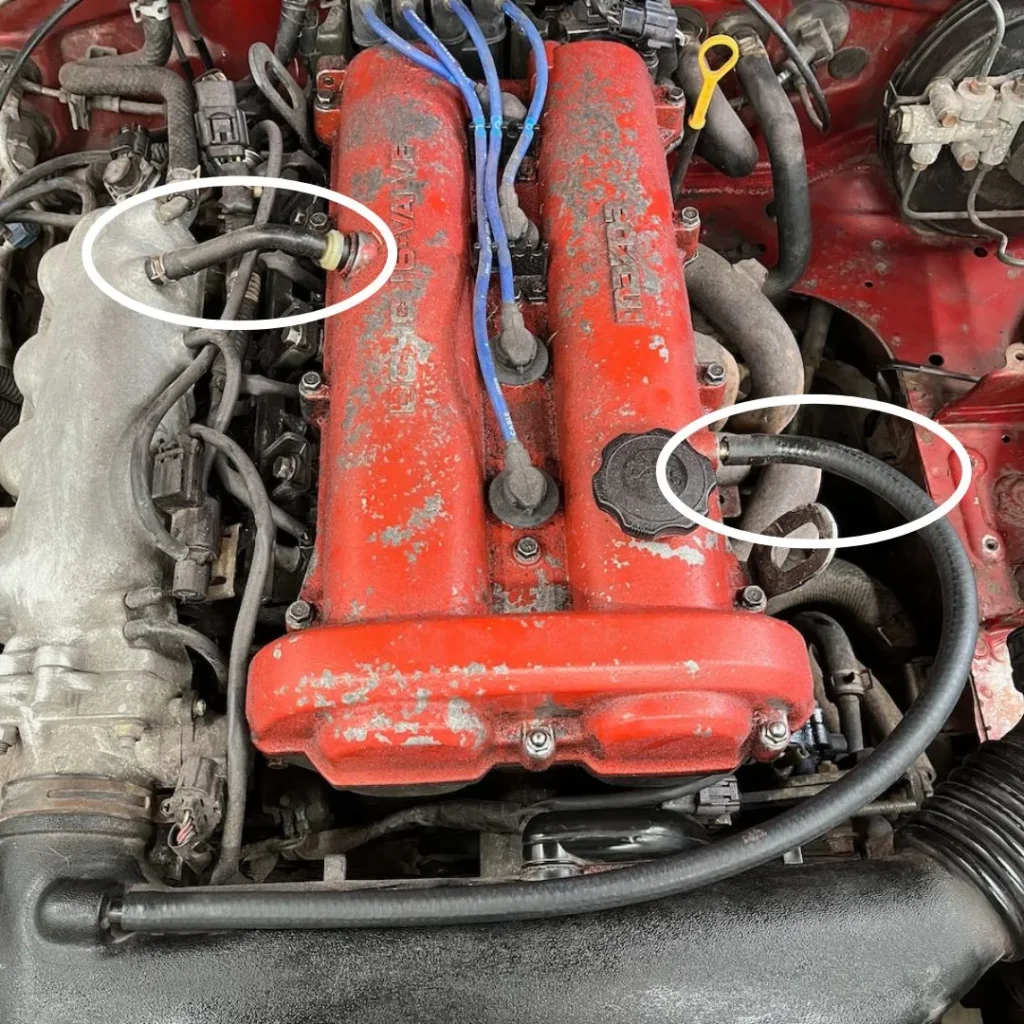
Be warned that the PCV valve is made out of plastic, which gets very brittle as these cars age. If you’re not careful, it is very easy to snap these as happened here. It’s not a bad idea to pick up an extra one to have on hand when you attempt this repair.
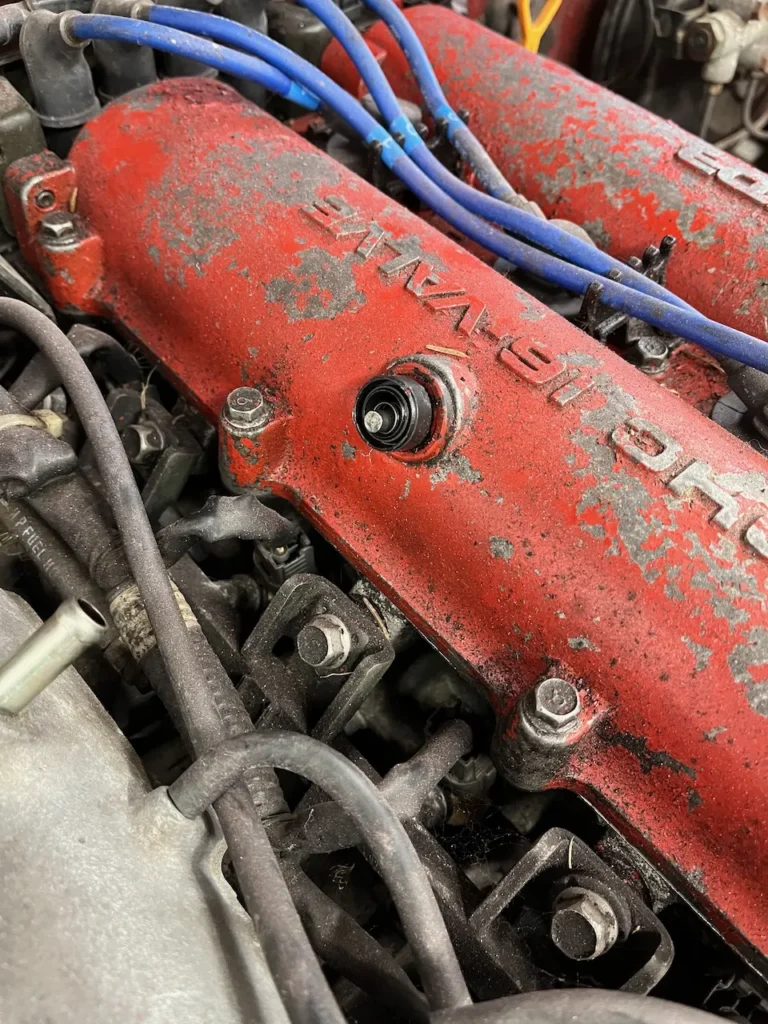
2. Remove each of your spark plug wires by wiggling on them and pulling up firmly. There is no need to fully remove them from the ignition coil at the back of the engine. However, if you want to take them off the car for even more space, be sure to reference our spark plug wire replacement guide and ensure you re-install them in the correct order.
3. Loosen all of the 10 mm bolts around the exterior of the valve cover, as well as those running down the middle of the valve cover between the spark plug wires.
Note that you do not need to remove the 2 8 mm bolts for the spark plug wire retainer clips.
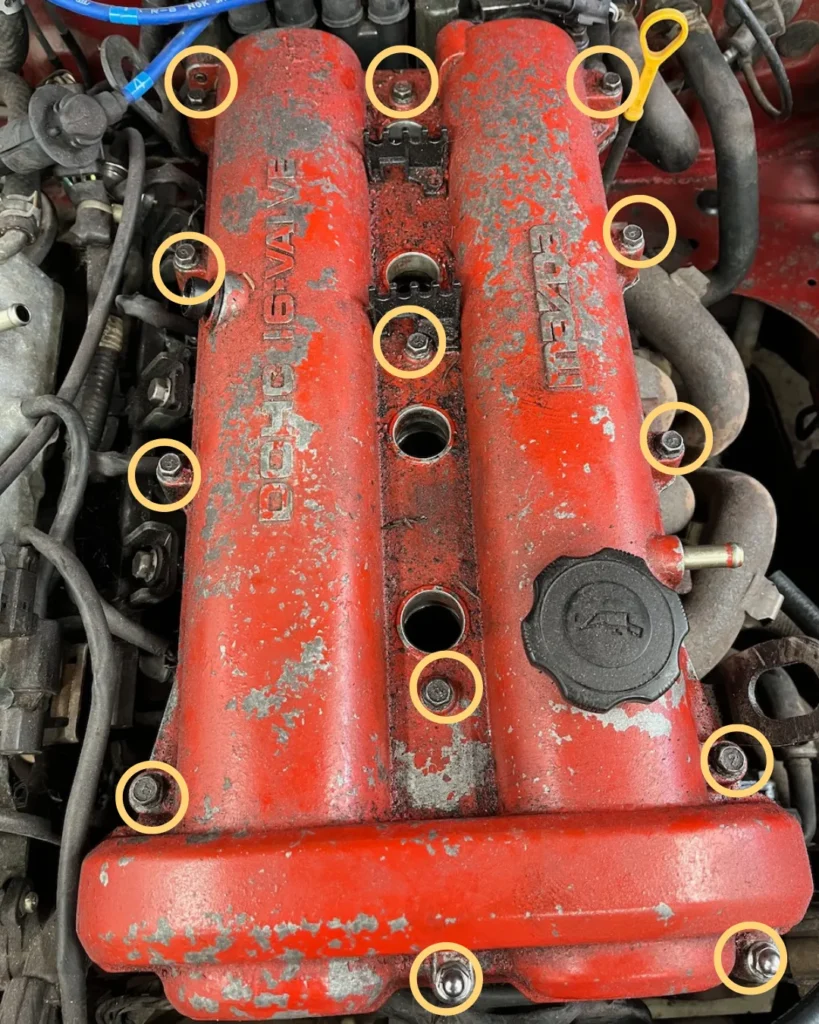
4. Using a box-end wrench the two 12 mm bolts at the rear of the valve cover. There is one on either side of the ignition coil. Unplugging the connectors for the CAS and oxygen sensors can give you some more room for this.
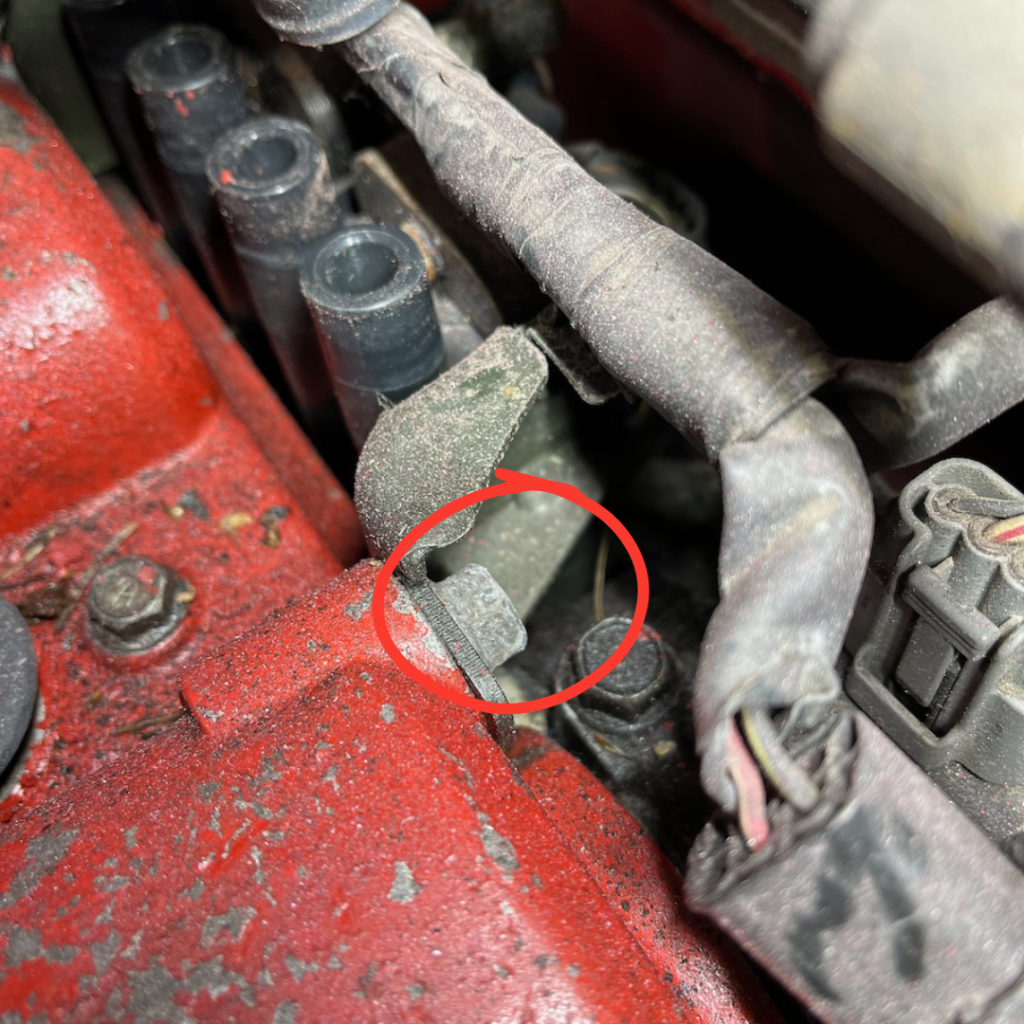
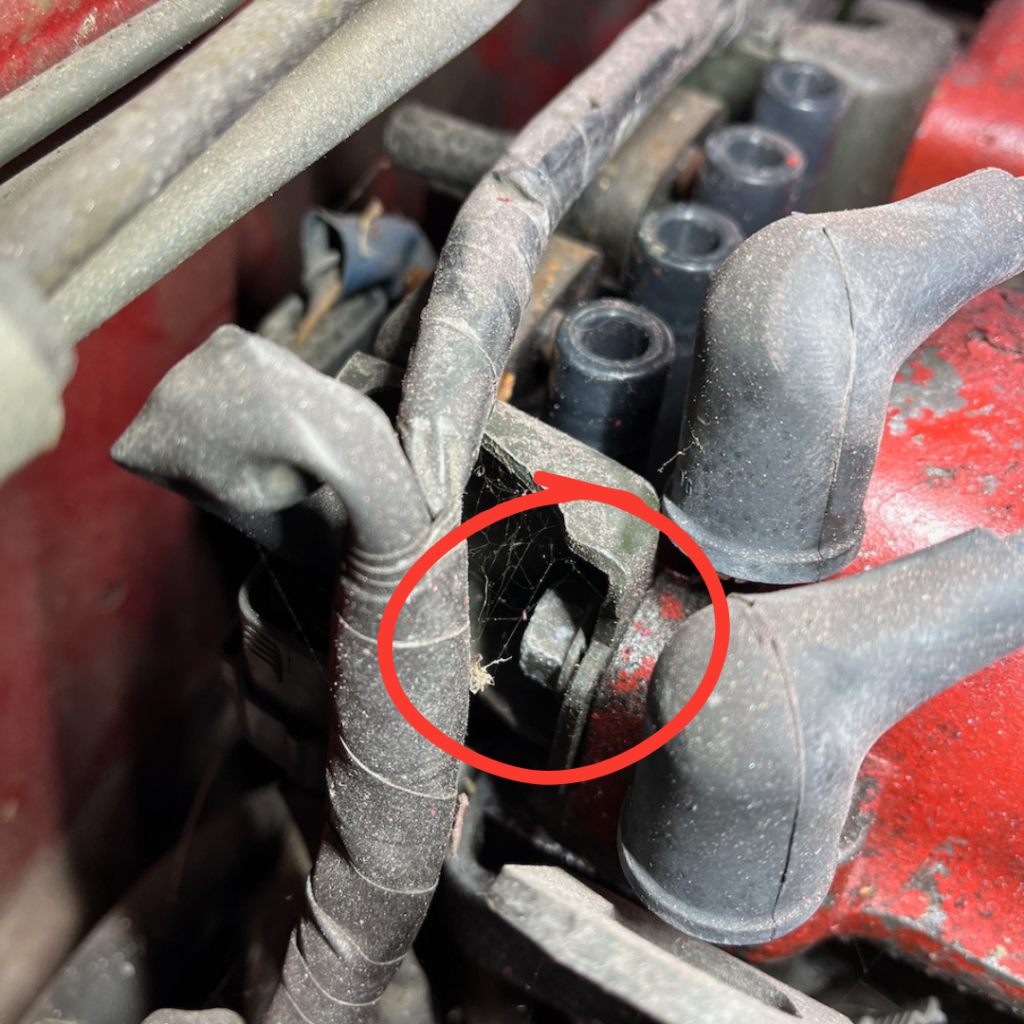
5. At this point the valve cover can be removed. A few taps with a rubber mallet may be helpful if it is stuck in place.
Do not use a screwdriver to pry the cover off as this can damage the gasket mating surface.
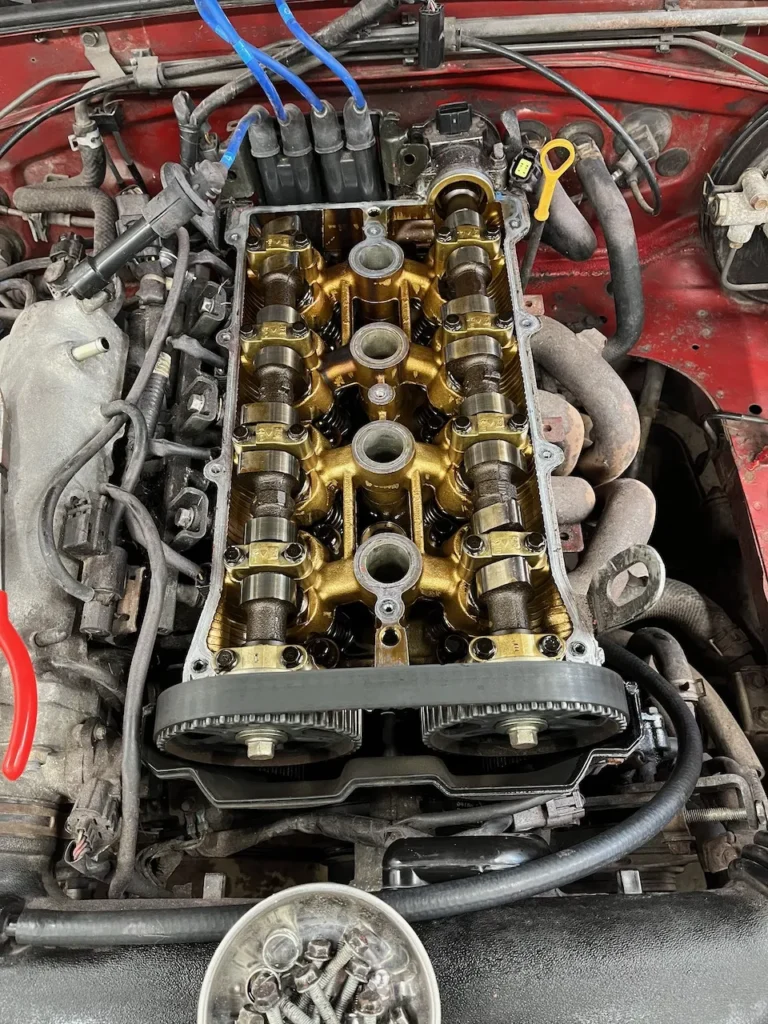
6. With the valve cover now removed, clean off the mating surface on the cylinder head. It will likely have pieces of the old gasket, old RTV / gasket maker, or dried up oil.
When cleaning off the mating surface, be careful not to gouge the metal. Use something soft, like an old credit card, to scrape off the old gasket if possible. Only resort to razor blades or gasket scrapers for really stuck-on pieces.
7. Press your new valve cover gasket firmly into the valve cover, making sure it is seated in all of the grooves. A dab of gasket maker around the half moons may be helpful here.
8. Reinstall the valve cover, ensuring that the gasket does not move or “roll” out of place.
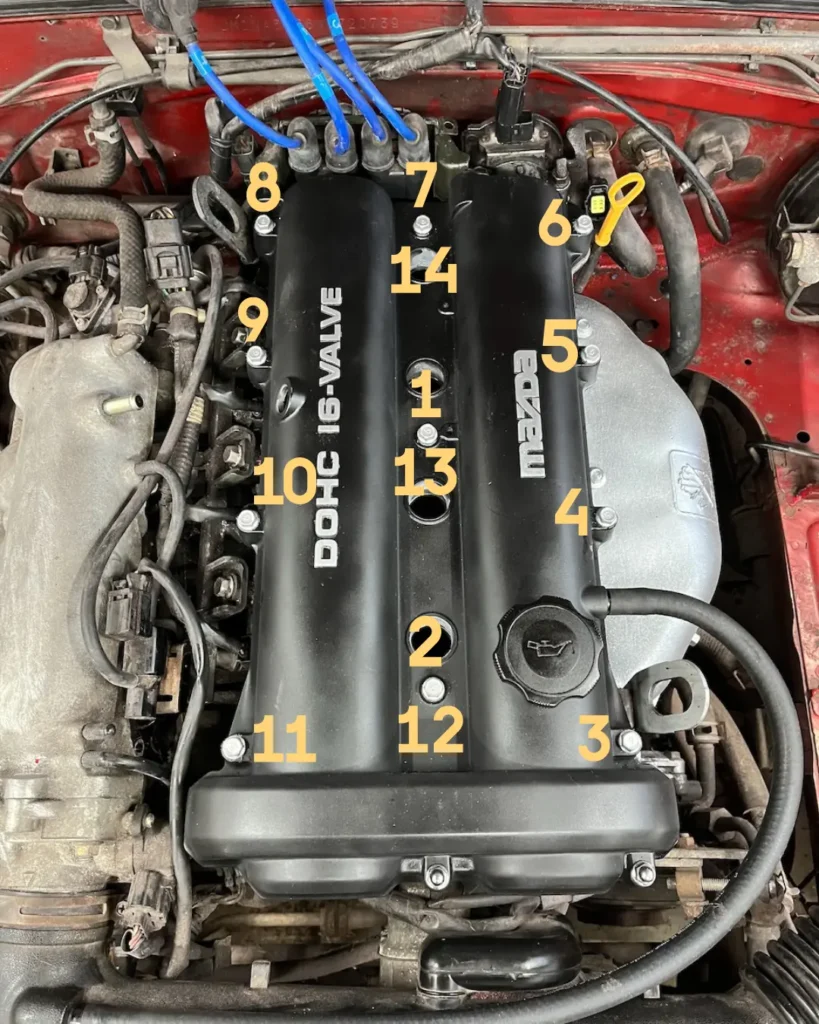
9. Reinstall valve cover bolts in the following pattern in a few “passes”. Start by tightening every bolt by hand, then snugging up every bolt with a 1/4″ ratchet, and then finally torquing each bolt to 6 ft-lbs.
Note that for the center 3 bolts, you should be snugging them down two times in each “pass”.
10. Push the spark plug wires firmly back in to place.
11. Reconnect breather / PCV hoses.
We hope that this guide has been helpful in walking you through the process of NA Miata valve cover gasket replacement. Check out our other NA Miata DIY guides here, and for more tips and tricks to keep you Miata running smoothly follow us on social media.
