
Your cart is currently empty!
NA / NB Miata Oil Change DIY
Changing your oil is one of the most important maintenance items on any car. This article will show you how to change the oil and oil filter on an NA (1990-1997) or NB (1999-2005) Mazda MX-5 Miata.
Required Tools for this Job:
- Some way of safely raising the vehicle – jack + jack stands or ramps
- 19 mm wrench or ratchet/socket (if you have an NA)
- 17 mm wrench or ratchet/socket (if you have an NB)
- drain pan for the old oil
Optional Nice-to-Have Tools for this Job:
Parts Required for this Job:
- OEM Mazda oil filter (or a quality aftermarket filter)
- 4 quarts of 10W-30 oil
- If you’re having problems with lifter tick / lots of noisy chatter at idle, try Rotella T6 oil
- New oil drain plug crush washer
Instructions:
- Raise the front of the car safely in the air by either driving up on ramps, or jacking the car up and securing it on jack stands. Make sure the back wheels are chocked, and give the car a firm shake to ensure it doesn’t budge before crawling underneath.
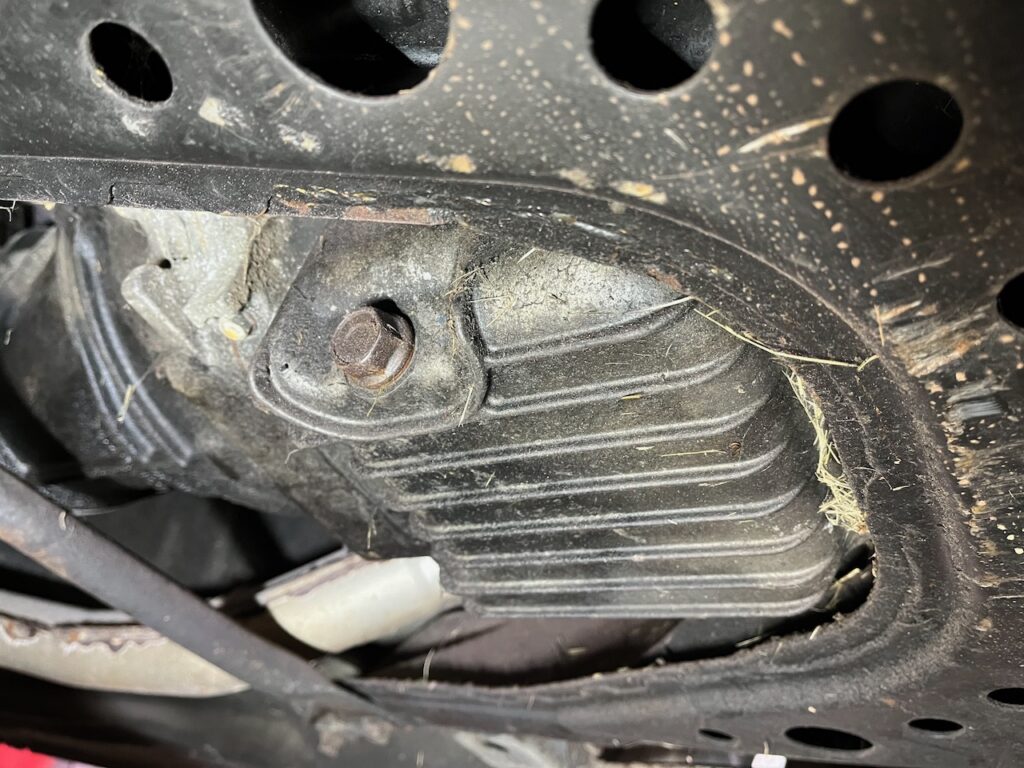
- Locate the oil drain plug. It is located at the bottom of the engine, pointed towards the passenger side of the car. It will be the only 19 mm (NA) or 17 mm (NB) bolt in the vicinity of your oil pan.
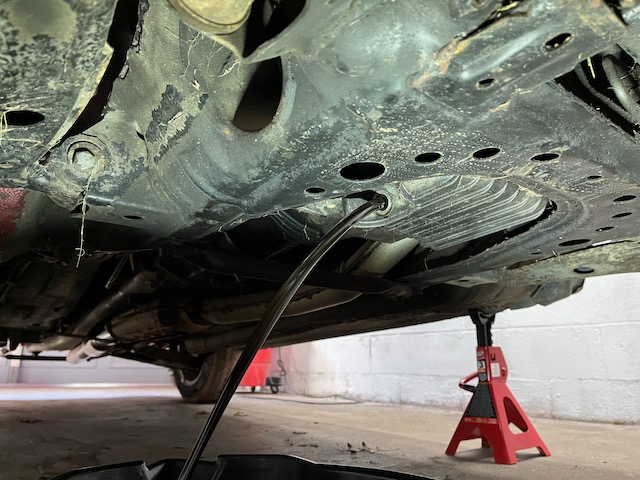
3. Move your drain pan underneath the drain plug and turn the plug counter-clockwise to break it loose. You should be able to unscrew it by hand after cracking it loose with your socket or wrench. Try not to drop the plug into your drain pan!
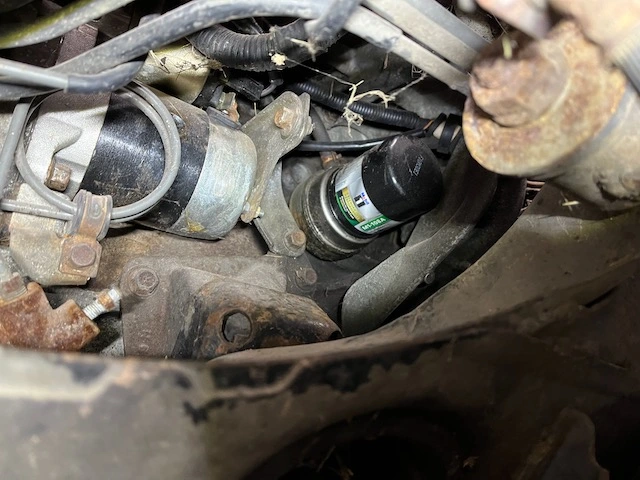
4. While the oil is draining, remove the oil filter. It is located on the passenger’s side of the engine, underneath the intake plenum. You should be able to see it when looking down from the engine bay, but it is often easier to access it through the wheel well. Either turn your wheels all to the left, or remove the right front passenger wheel entirely for more room. You should be able to loosen the filter by hand, but if it is really tight, a filter wrench may make the job easier.
5. Install the new oil filter. Before you screw it, take some oil and put it on the rubber O-ring around the new filter. This will ensure a proper seal.
6. Re-install the oil drain plug with the 19 mm (NA) or 17 mm (NB) socket / wrench. Do not overly-tighten the plug, it will strip or crack your oil pan. Snug the bolt up with to ensure it won’t come loose and stop.
7. Unscrew the oil filler cap on the valve cover and fill the car with fresh oil. The funnel will come in handy here. Start by filling the car with 3.5 quarts of oil. Then start the car and check for leaks underneath.
8. After running the car for about a minute and ensuring there are no leaks, shut it off and safely lower the car back onto level ground. Check your oil level on the dipstick and make sure it is correct. Add a small amount if needed / level is low.