
Your cart is currently empty!
NA Miata Taillight Gasket Replacement
If you do some searching around, you will quickly find that water in the trunk of your NA Miata is a common problem. There are a few things that can cause this, including the soft top drains or rain rail.
While the soft top drains are easy to check and clear out, replacing the rain rail is a big job, and probably not a job you want to jump right in to the first time you notice dampness or water in your trunk. There is, however, a third common culprit of Miata wet trunks – the taillight gaskets. And unlike the rain rail, they are very cheap and easy to replace.
This step-by-step guide will show you exactly how to replace the taillight gaskets on your NA Miata and keep your trunk dry!
Parts Required:
- Tail light gasket (recommended that you buy 2 and replace both)
Tools Required:
- 10 mm deep socket and socket wrench
Instructions:
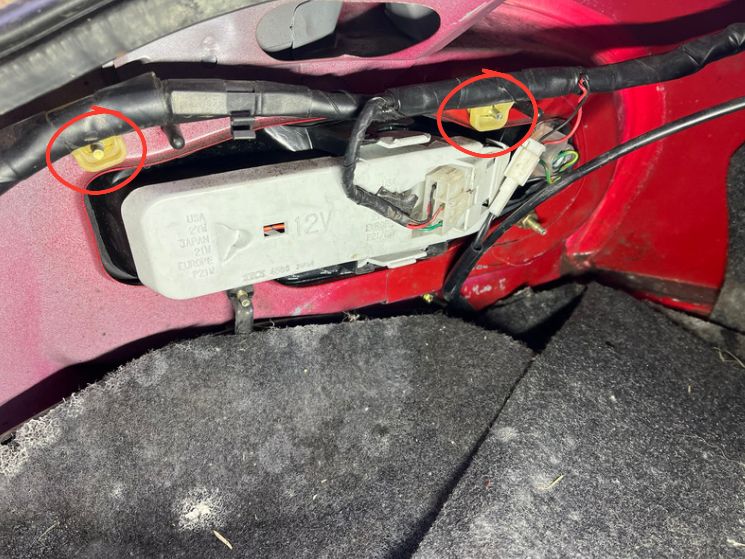
- Open your trunk and pull back the interior trim to expose the back of your taillight.
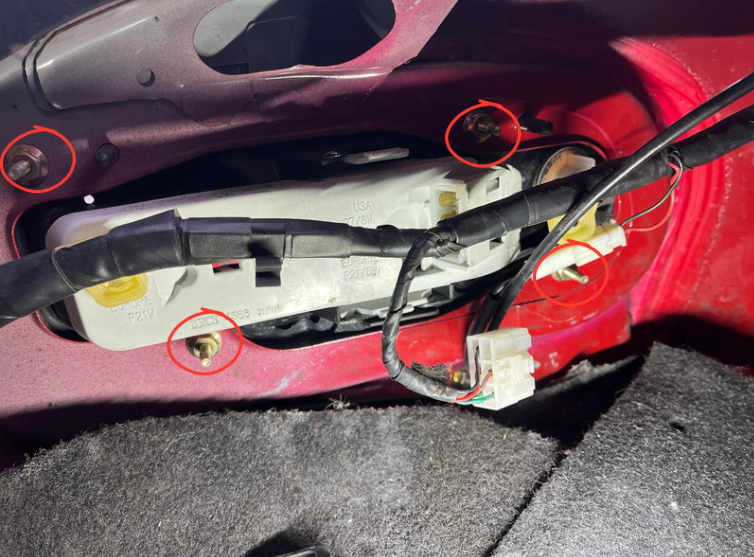
2. There are 4 nuts that hold in the taillight. The top 2 have clips for the wiring loom covering them. Simply pull these clips off and you should have visibility to the 4 nuts.
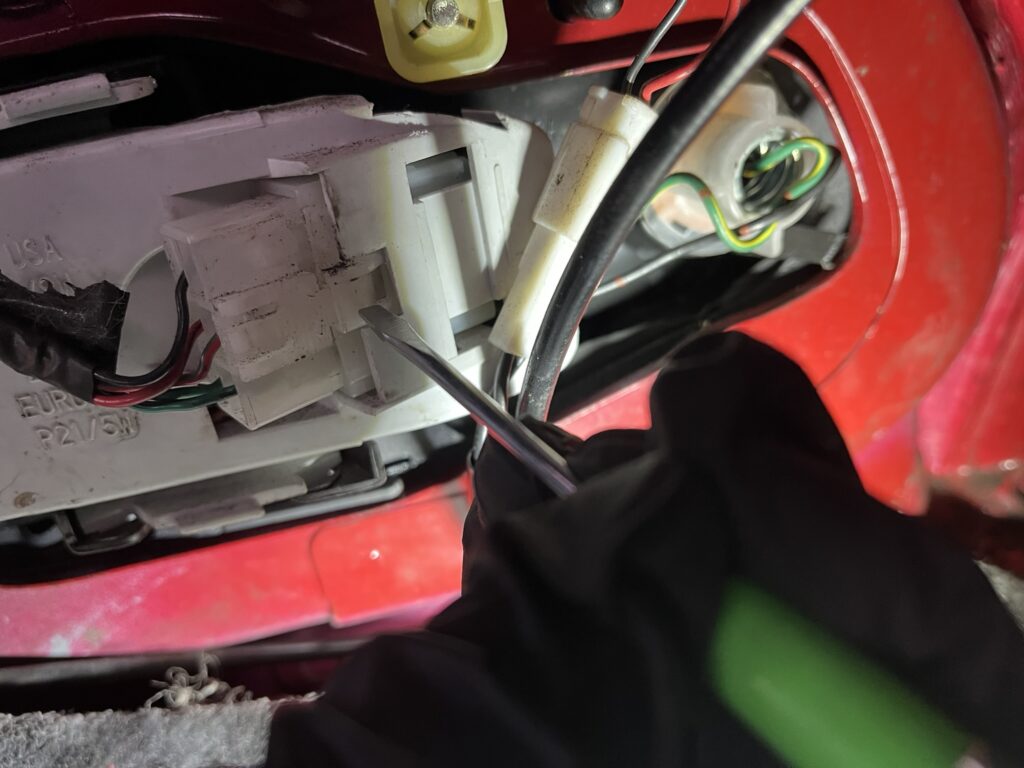
3. Push in the tab and pull back on the electrical connector to disconnect the wiring loom going to the taillight.
4. Undo the 4 10mm mounting nuts attaching the taillight to the body of the car.
5. At this point you should be able to push out the taillight. In some cases, particularly if the gasket was previously replaced and a lot of sealant was used, it may be “stuck”. You should be able to push on one of the mounting studs with your socket wrench to loosen it up.
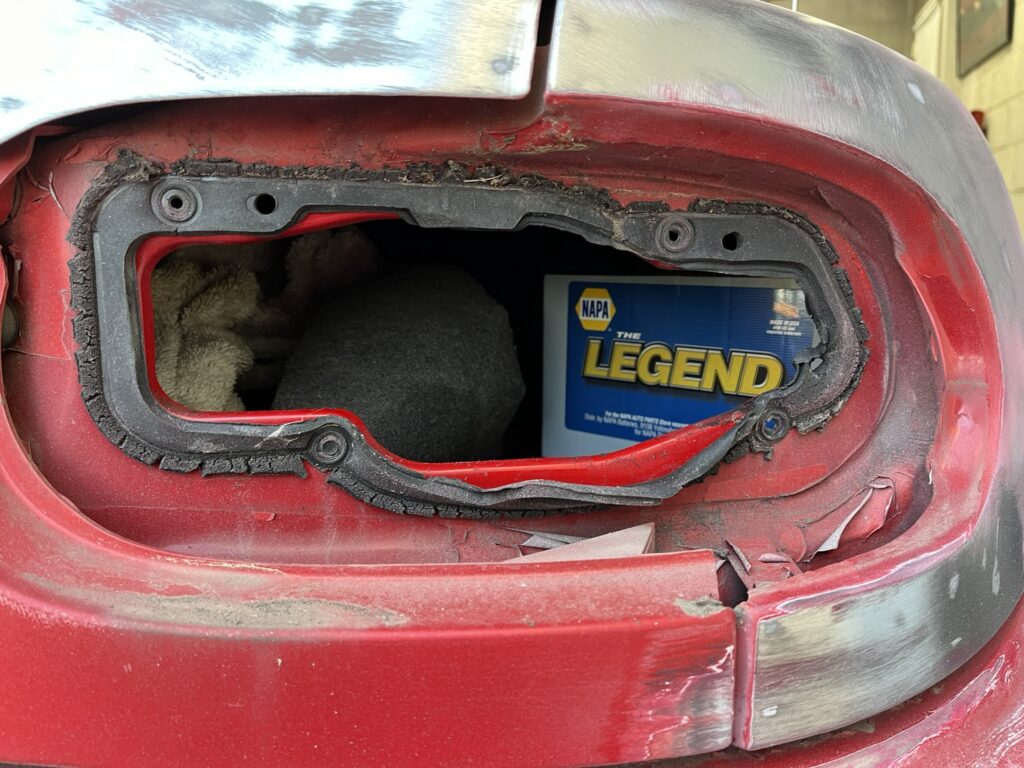
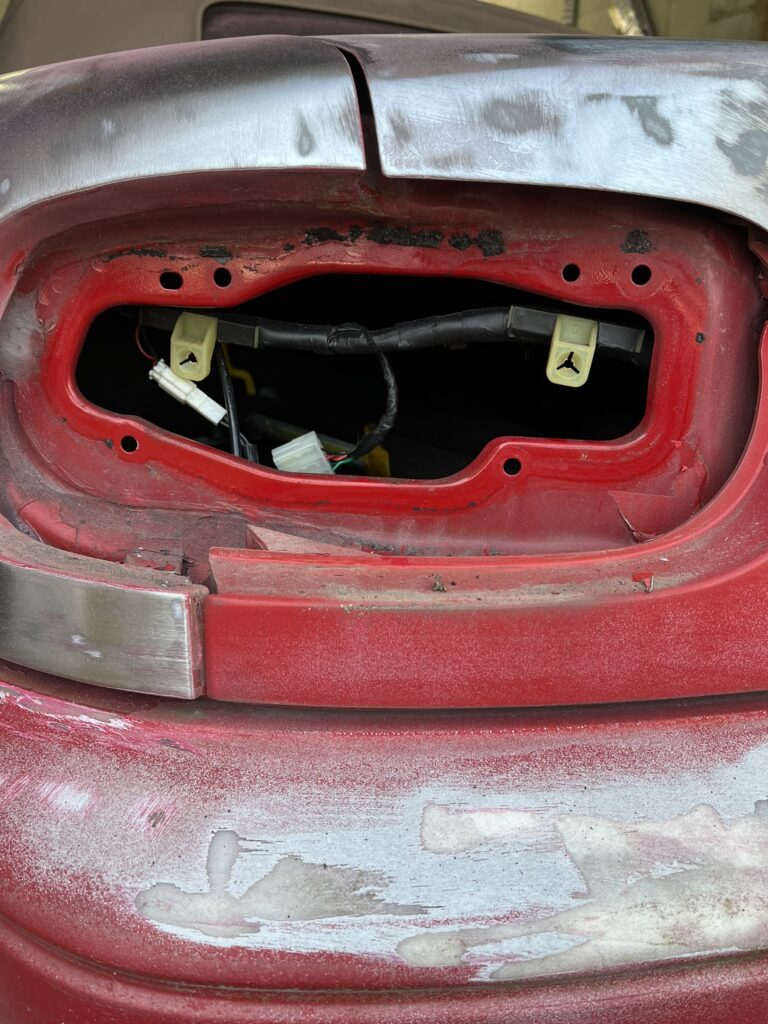
6. You can see here that dry-rotted pieces of the old gasket were stuck to the body of the car. You’ll want to pick all of those off before installing the new gasket, being careful not to scrape the paint (unless you are removing the taillight to prep the car for paint like we are!)
7. Line up your new gasket with the studs on your taillight.
8. For extra security and prevention against further water leaks in your trunk, apply a small amount of gasket maker to the the new taillight gasket. Then gently push the taillight back in to the body of the car.
9. Re-install the 4 nuts on to the mounting studs.
10. Reconnect the taillight electrical connector, and clip back on the wiring loom to the taillight studs if needed.