
Your cart is currently empty!
NA Miata Front Bumper Removal
This guide will walk you through the step-by-step process of NA Miata front bumper removal. Whether you are replacing your front bumper with an aftermarket one for a different look, or are prepping the car for paint like we were in this case – this will show you the steps.
Tools Required:
- Jack and jack stands to raise the car
- Philips screwdriver
- 10 mm socket and socket wrench
- Trim removal tools
Instructions:
- Pop up the headlights and jack up the car.
2. Remove the turn signal / marker lights from both sides of the front bumper. Each light has 2 Philips head screws. You don’t need to remove them all the way in order for the light to pop off the bumper. Then give the electrical connector a half-turn to pop the bulb out.
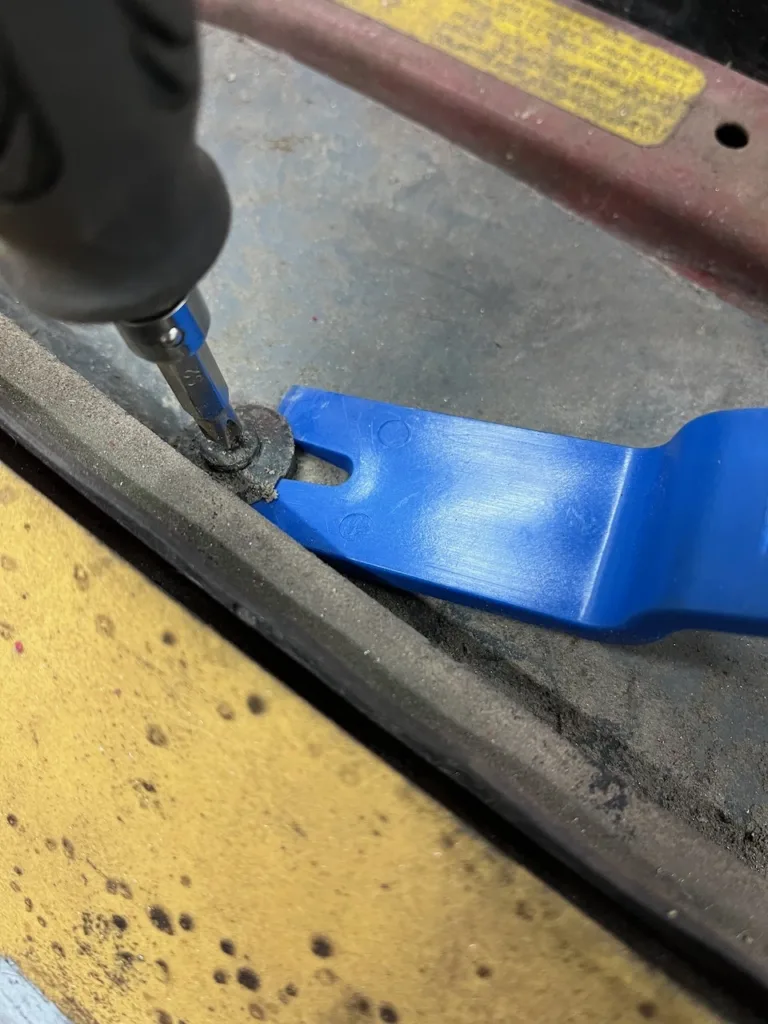
3. Remove the upper radiator shroud. It is held in place with 4 plastic fasteners. The fasteners have a Philips screw in the middle and come apart in 2 pieces.
It is common for the screw portion to spin in place endlessly. If this happens, wedge a trim removal tool underneath the entire fastener to apply a little pressure as shown here. Then you should be able to unscrew the middle portion normally.
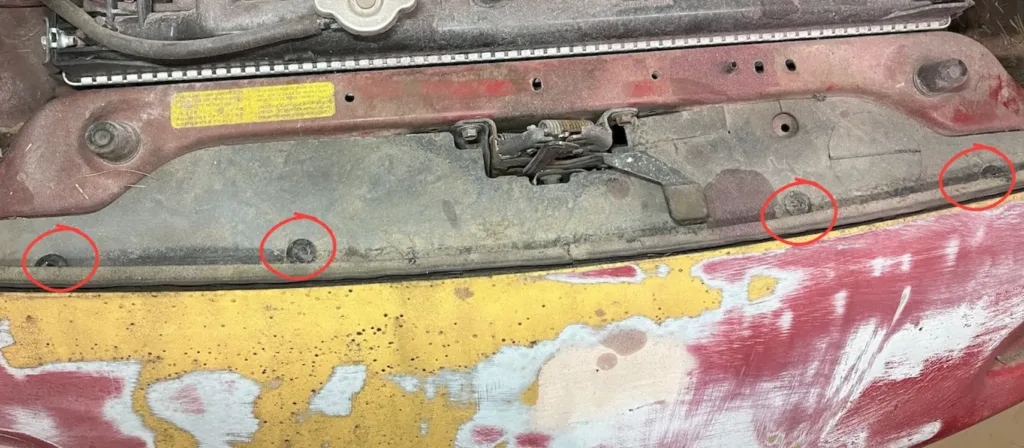
4. With the radiator shroud removed, you will have easy access to remove the the x6 10 mm bolts.
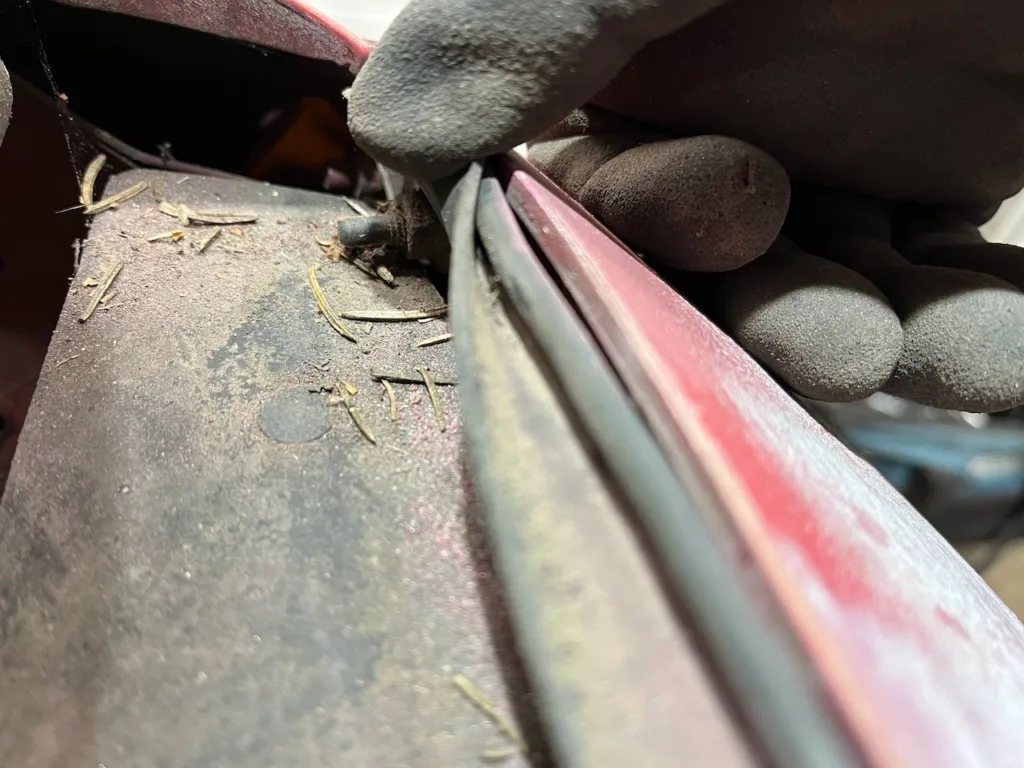
5. On each side of the bumper there is a 10 mm nut that needs to be removed. These are only visible if you have the headlights up and pull pack the rubber weatherstripping behind the bumper.
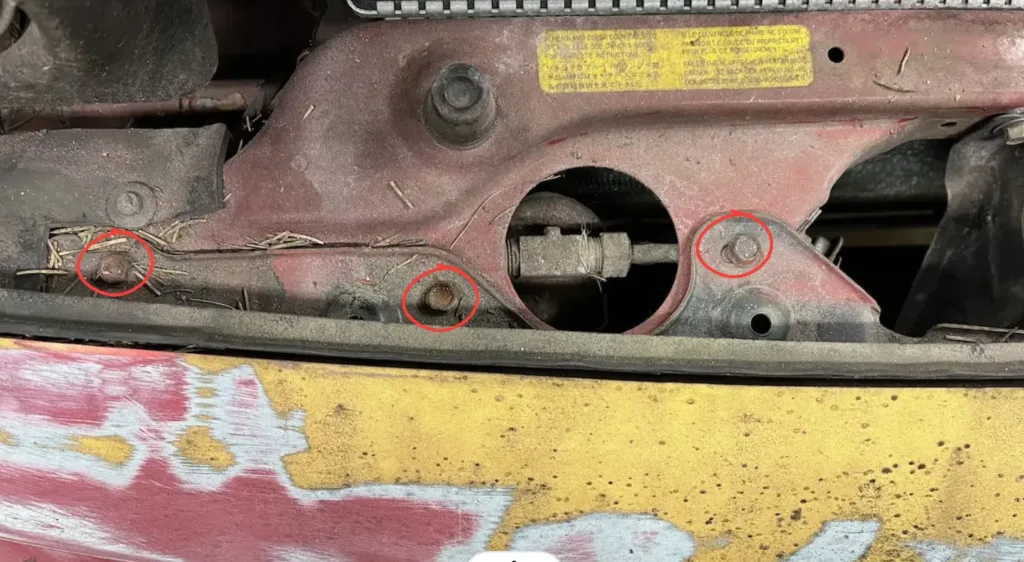
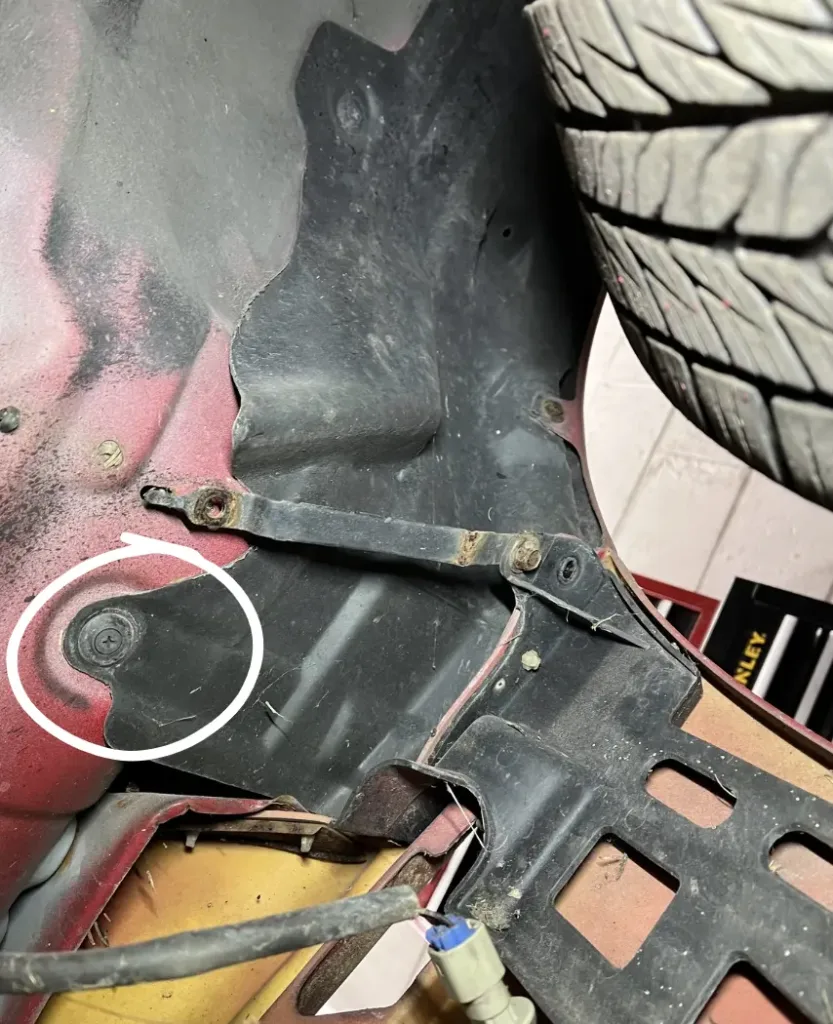
6. Within each wheel well, you have 3 fasteners to remove.
First, there is a Philips head screw connecting each side of the bumper to the respective fender (shown in the top right of the picture.)
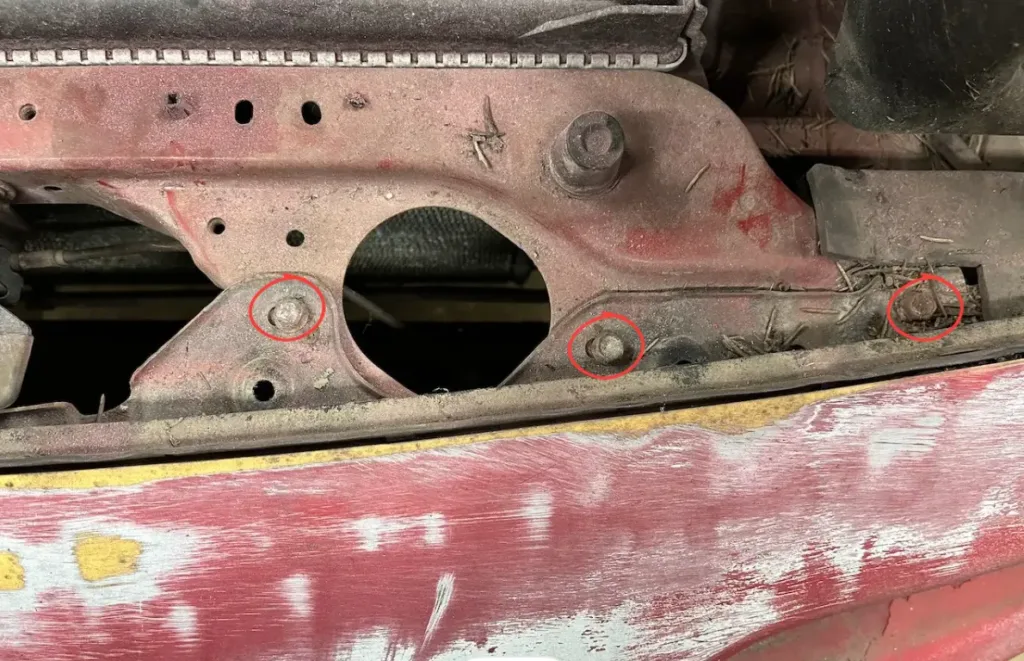
Next, there are 2 “braces” within each wheel well (4 braces total.) They are secured in place with a 10 mm on each end. You only need to remove one of the fasteners from each brace.
It’s recommended that on both sides you remove the inner fastener that is attached to the black plastic intake grille (circled in green). By doing this, you will be able to pull off the front bumper and the intake grille as an assembly and not have to deal with a million plastic fasteners.

7. Lastly, on each side of the car there are 2 studs with nuts on them that are coming off of the front bumper and going through the fender. These can be very tricky to access.
To access the two studs, you will need to remove this plastic fastener which you can see by crawling under the car and looking directly “up” in the wheel well.
Once that plastic fastener is removed, you can pull the plastic cover backward to reveal the two 10 mm nuts. Your hand will probably cramp up when undoing these as access is very limited.

At this point the front bumper (along with the air intake grille) should be free and loose, and you can pull it off the car.
We hope that this guide has been helpful in walking you through the process of NA Miata front bumper removal. For more tips and tricks to keep you Miata running smoothly follow us on social media.