
Your cart is currently empty!
NA / NB Miata Brake Pad and Rotor Replacement
This step-by-step guide will show you how to replace the front brake pads and rotors on an NA (1990-1997) or NB (1999-2005) Mazda Miata.
Replacing your brakes yourself is one of the best return-on-investments you will ever do on your car. Every car in the world will need to have the brakes replaced at some point, and it is one of the easiest and most beginner-friendly jobs to do.
| Estimated Mechanic Cost (Parts + Labor) | Cost of Parts | DIY Savings |
| ~$650 | ~$100 | $550 |
Tools Required:
- Brake Caliper Compression Tool
- 14, 17 mm socket and socket wrench
Parts Required:
Instructions:
1. Raise the front of the car safely in the air by jacking the car up and securing it on jack stands. Make sure the back wheels are chocked, and give the car a firm shake to ensure it is safe to proceed.
2. Remove the wheel of whichever side you are working on. Insert your key so the car has accessory power but do not turn the car on. Then turn the wheel all the way in the opposite of whichever side of the car you are working on. This will give you more room to work on the brakes.
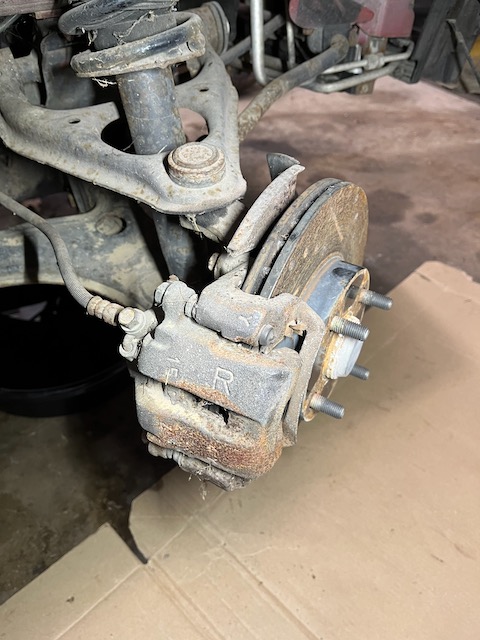
For example, in this picture we are working on the front right (passenger) side of the car, so we have turned the wheel all the way to the left to give us room to work. If you are working on the front left (driver’s) side you would turn the steering wheel all the way to the right.
3. Remove the top 14 mm caliper slider bolt. If you are only changing out your brake pads (not rotors) you can simply remove this bolt, swing the caliper down and replace your pads at this step. Otherwise, proceed to the next step.
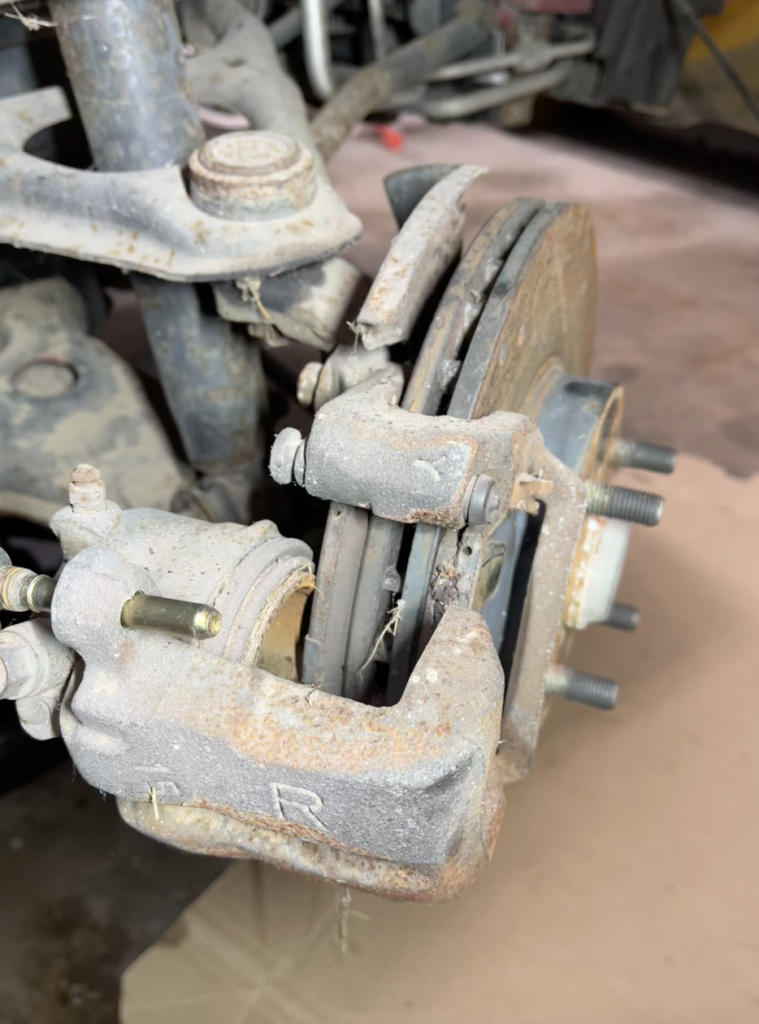
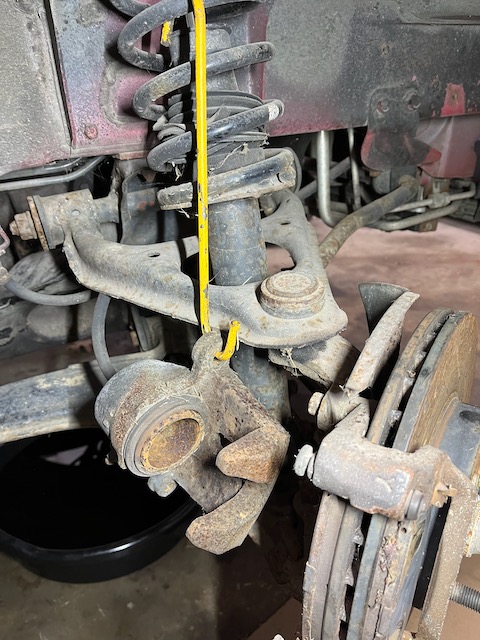
4. Remove the bottom 17 mm caliper slider bolt. At this point you should be able to wiggle the caliper off the rotor. Do NOT let it hang by the brake line. If you are using the brake compression tool we recommend, it should include an S hook to hang the caliper like shown in this picture.
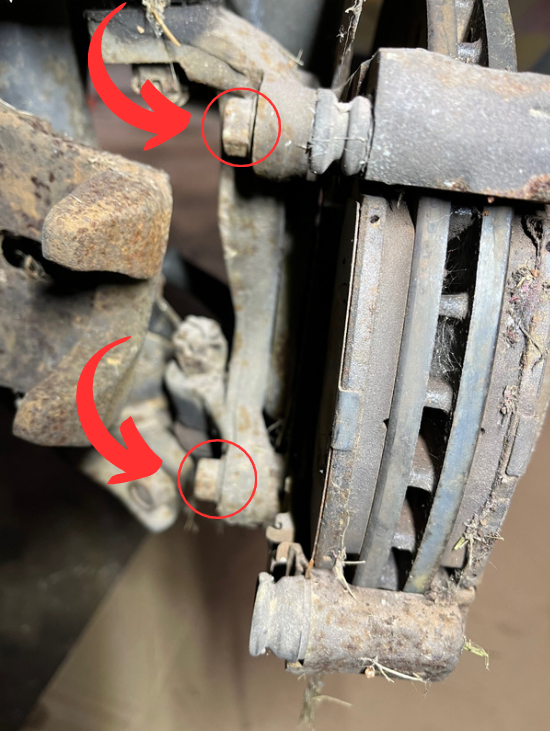
5. Remove the two 14 mm caliper bracket bolts.
6. Remove the brake rotor. If yours is rusty, like mine was, you may need some “persuasion” from a hammer in order to loosen it up enough that it wiggles off.
7. Spray your new brake rotor with brake cleaner and wipe down with a towel or rag.
8. Re-install your caliper bracket.
9. Clip your new brake pads in to the caliper bracket.
10. Using the brake caliper compression tool, push in the caliper until it is fully recessed and the caliper has clearance to fit over the new brake pads.
11. Re-install the 2 caliper slider bolts.
12. Re-install the wheel, and repeat this process for the other side of the car. Brakes should always be replaced in “pairs”.
13. Since you had to compress the brake calipers, you will need to “pump” the brake pedal a few times. Simply push the pedal all the way to the floor, release, and repeat until you feel pressure in the pedal.