
Your cart is currently empty!
NA Miata Alternator Belt Replacement
This article will walk you through an NA Miata alternator belt replacement (also known as the alternator / water pump belt.) It’s important to check your drive belts regularly and replace them at the first signs of wear.
Old belts that are “cracking”, showing signs of dry rot, or making squealing noises, could leave you stranded on the side of the road in need of a costly tow. Fortunately, replacing your drive belts is an easy job you can do yourself to save money and avoid headaches.
| Estimated Mechanic Cost (Parts + Labor) | Parts Cost | DIY Savings |
| $225 | $25 | $200 |
Parts Required:
- Alternator / Water Pump Belt FOR 1.8 ENGINES (1994-1997)
- Alternator / Water Pump Belt FOR 1.6 ENGINES (1990-1993)
Tools Required:
Instructions:
- Firstly, you must remove your AC / power steering belt. Follow steps 1-5 of our guide here and then come back to this page.
- Second, removing the upper radiator can help give you some extra space. This step is optional. Removing the hose will result in some coolant loss. Prepare a catch pan underneath the car if you decide to do this.
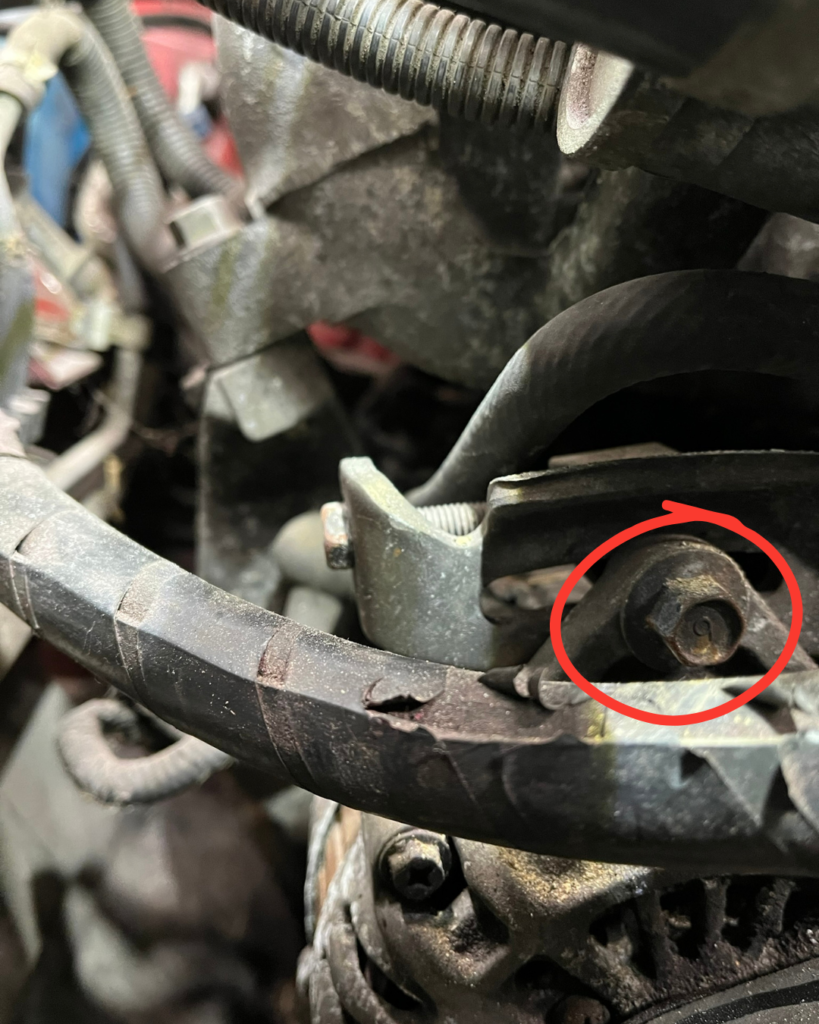
- Next, similar to the AC / power steering belt, there are 3 pivot fasteners that you will need to loosen in order to remove the alternator belt. The first bolt is easily visible right above the alternator. Do not loosen the tension bolt (to the left) at this time.
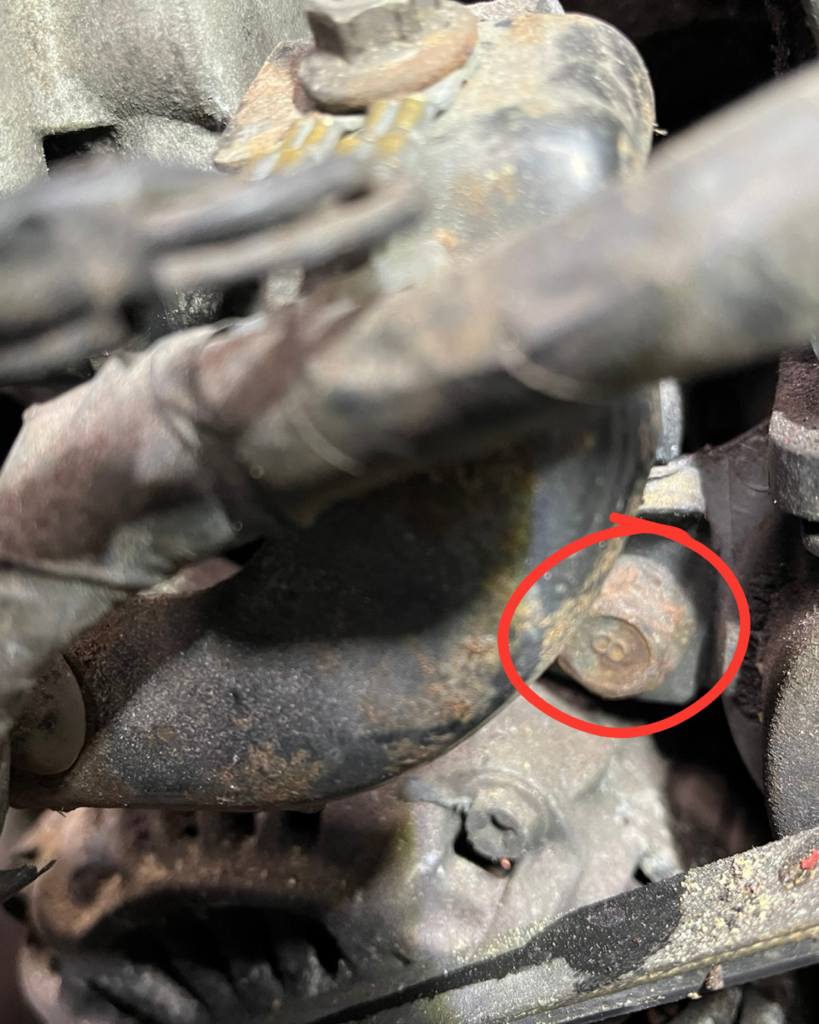
4. The second fastener you will need to loosen is located slightly above and to the right of the alternator, right up next to the timing cover.
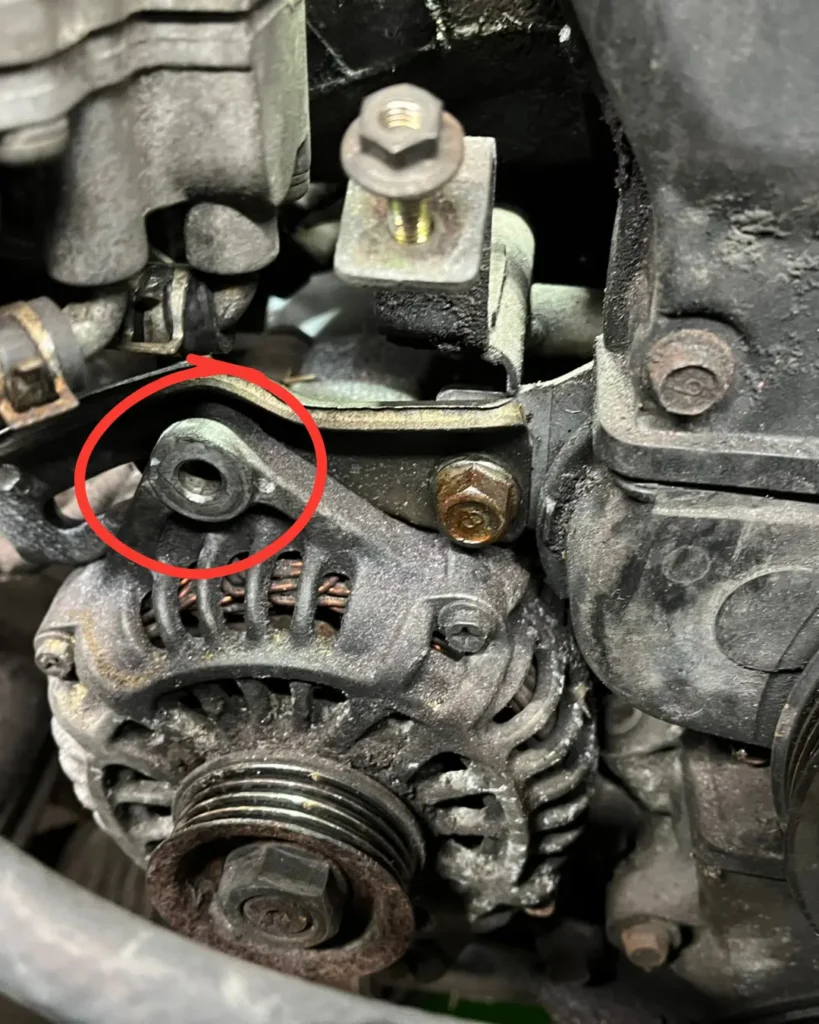
5. The third fastener is located on the bottom of the alternator. The bolt runs all the way through the alternator from the back, and is really only accessible with a 14 mm wrench. While space is limited, remember that you only need to loosen this bolt, not fully remove it.

6. At this time you should be able to start loosening the tension bolt. Unfortunately, this bolt is difficult to access and loosen. You will only be able to turn the bolt about a quarter turn at a time.
To save some time, I prefer to fully remove the first pivot bolt (that you loosened in step 3) and tensioning bolt together. This allows you to easily slide the alternator around to free up space and remove your old belt and install your new belt.
7. With your new belt installed, reinstall the pivot bolt and tensioning assembly that you removed in step 6. Do not fully tighten the bolts.
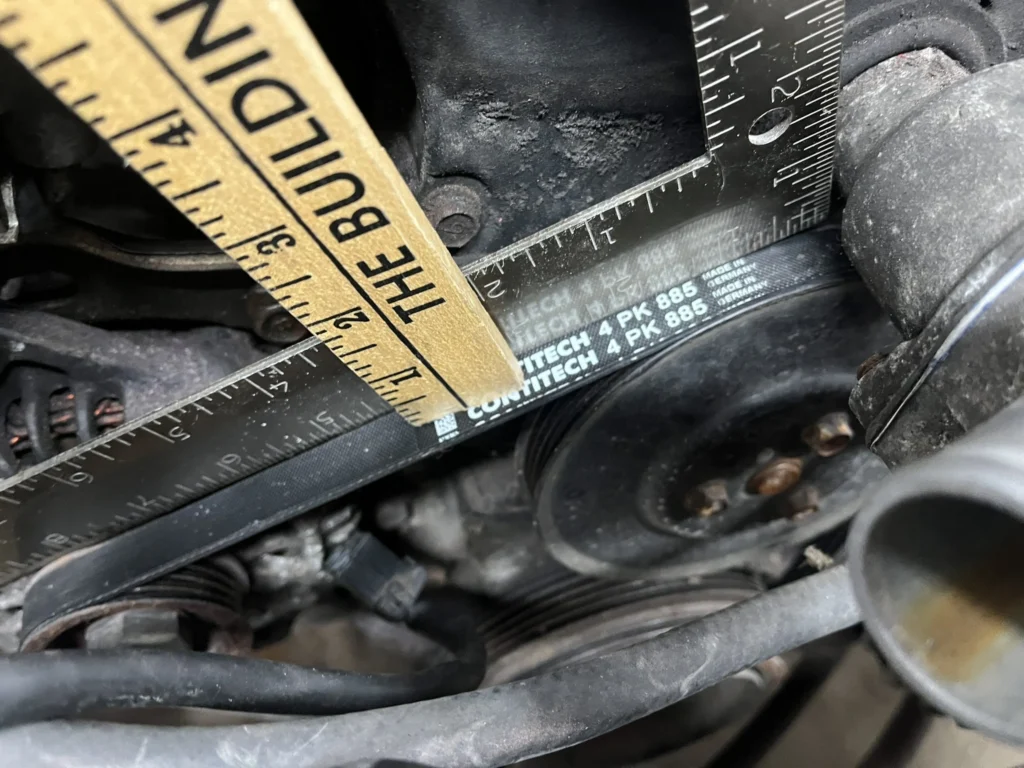
8. Next, you will need to tension the new belt. You can purchase special belt tensioning tools that are made for this purpose, but you do not necessarily need them.
Take a small straight-edge and place it on the belt between the alternator pulley and the water pump pulley. I used a small carpenter’s square. Then use a ruler to push down on the belt. There should be about a 1/4″ gap between the belt and your straight edge. If there is a larger gap, keep tightening the tension bolt. If the gap is smaller than 1/4″, loosen the tension bolt.
9. At this point the belt should be properly tensioned. Snug up the 3 pivot bolts that were loosened in steps 3-5.
10. Finally, this concludes the alternator belt replacement process. You can resume our guide to replacing your NA Miata air conditioning / power steering belt at step 6.
We hope that this guide has been helpful in walking you through the process of NA Miata alternator belt replacement. Check out our other NA Miata DIY guides here. Follow us on social media for more tips and tricks to keep your Miata running smoothly.