
Your cart is currently empty!
NA Miata Air Conditioning / Power Steering Belt Replacement DIY
It’s essential to replace your belts on any older vehicle. Over time, this belt can wear, crack, or snap, leading to a loss of power steering and AC function. This guide will walk you through the process of NA Miata Air Conditioning / Power Steering Belt Replacement.
If your Miata came equipped without A/C and without power steering then you do not have this belt.
If your Miata came equipped with one of either power steering or air conditioning, then you can still follow this guide, although your engine will look a little different than the pictures shown.
| Estimated Mechanic Cost (Parts + Labor) | Parts Cost | DIY Savings |
| $225 | $25 | $200 |
Tools Required:
- Socket wrench and 12, 14, 21 mm sockets
- 12 and 14 mm wrenches
Parts Required:
Note that Miatas use different belts depending on your engine (1.6 engine, 1.8 engine) and configuration (having power steering and AC).
Be sure to double check your configuration and select the correct belt from the options below:
| Engine | WITH power steering AND air conditioning | Power steering only, WITHOUT air conditioning | Air conditioning only, WITHOUT power steering |
| 1.6 | Buy here | Buy here | Buy here |
| 1.8 | Buy here | Buy here | Buy here |
Instructions:
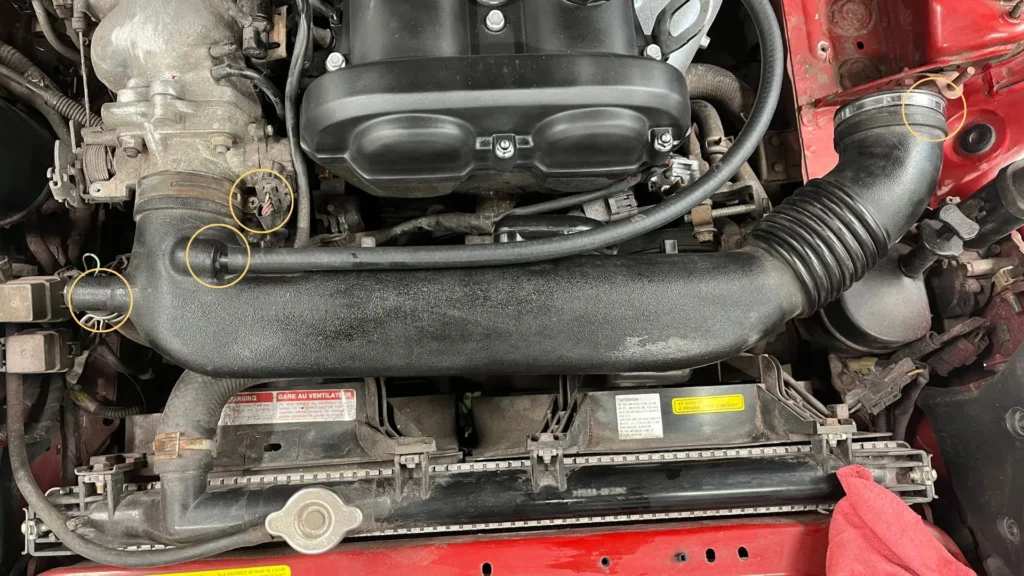
- Begin by removing the plastic intake crossover tube. This is done by loosening two hose clamps – one on the throttle body and one on the mass-air flow sensor. Then disconnect two vacuum hoses – one running over to the valve cover and the other underneath the crossover tube.
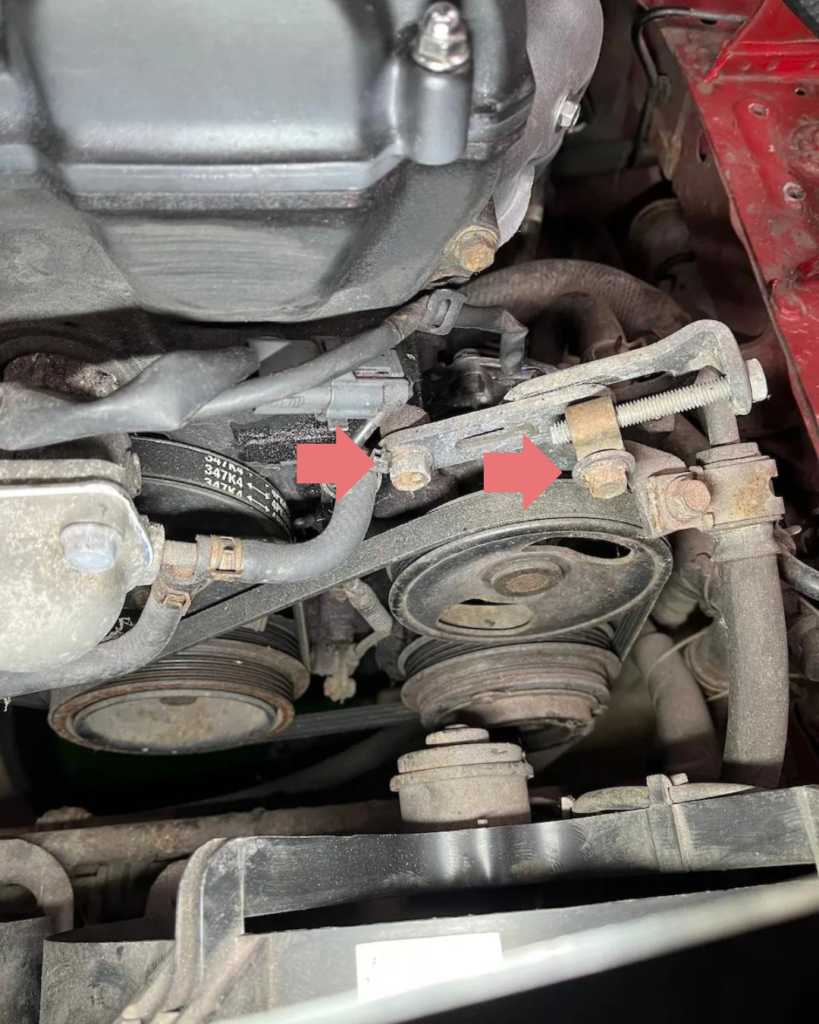
2. Next, you will need to loosen, but not fully remove, these 2 fasteners on top of the power steering pump. Depending on what year your Miata is, there may also be a nut on the back of these bolts that you will need to hold with a wrench.
3. There is a third bolt that you will also need to loosen, but not fully remove. This bolt is accessed through slots in the power steering pump. You may need to use a 21 mm socket on the crankshaft and rotate the engine by hand until you are able to access this bolt. See the picture below for a reference of where the slots on the pulley should be to access the bolt.
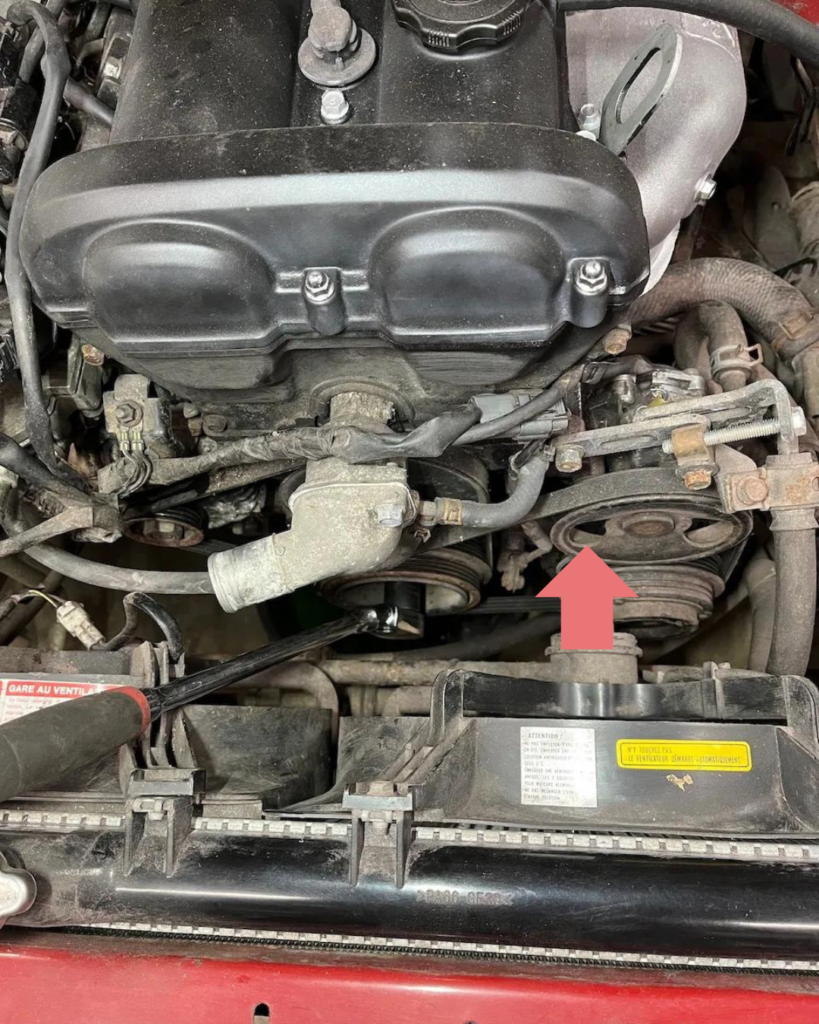
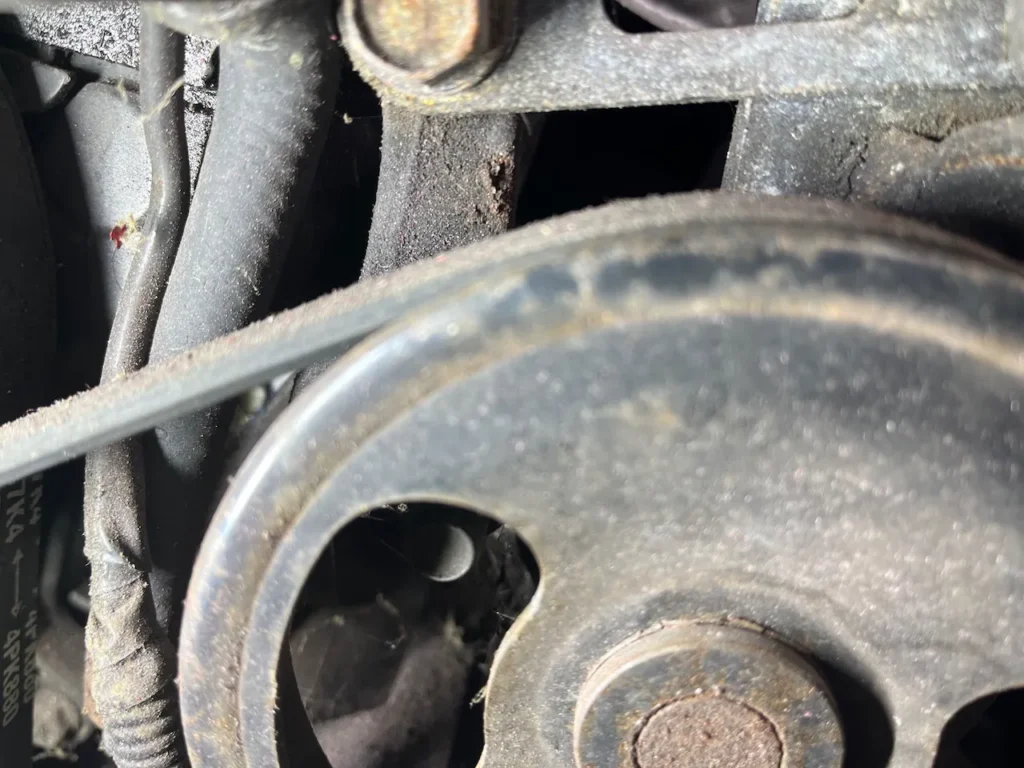
4. Once you align the pulley as shown in the previous picture, you should be able to access and loosen the third bolt.
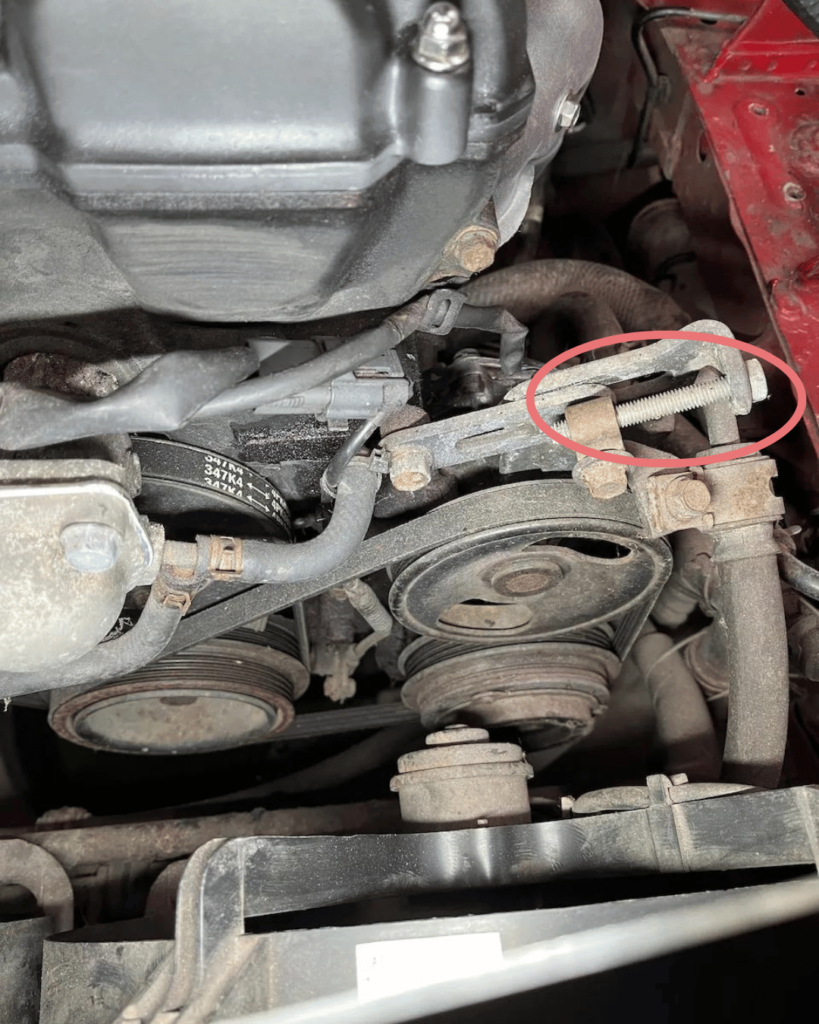
5. Finally, with all 3 of the pivot fasteners loose, you can start to loosen the tension bolt. You do not need to fully remove this bolt. As you loosen it, try and push down on the power steering pump itself. As the bolt gets more loose, it will free up more slack in the belt until you are eventually able to slip the belt off of the pulley.
6. If you are also replacing your alternator / water pump belt, now is the time to switch over to our other guide.
If you are only replacing your air conditioning / power steering belt, proceed with slipping on the new belt.
7. You will now need to tension the new belt. You can purchase a belt-tensioning tool for this if you prefer, but it is not required.
Take a small straight-edge and place it on the belt between the power steering pump pulley and crank pulley. I used a small carpenter’s square. Then use a ruler to push down on the belt. There should be about a 1/4″ gap between the belt and your straight edge. If there is a larger gap, keep tightening the tension bolt. If the gap is smaller than 1/4″, loosen the tension bolt.

8. The belt should now be properly tensioned. Snug up the 3 pivot bolts that were loosened in steps 2 and 3.
9. Lastly, re-install the air intake crossover tube.
We hope that this guide has been helpful in walking you through the process of NA Miata Air Conditioning / Power Steering Belt Replacement. Check out our other NA Miata DIY guides here, and for more tips and tricks to keep you Miata running smoothly follow us on social media.