
Your cart is currently empty!
NA Miata Ignition Coil Replacement DIY
This article will walk you through NA Miata ignition coil replacement. If you are having problems with your NA (1990-1997) Miata misfiring and tripping check engine lights, the ignition coil pack may be the culprit. You may also want to try replacing your spark plugs or spark plug wires.
| Estimated Mechanic Cost (Parts + Labor) | Parts Cost | DIY Savings |
| $500 | $150 | $350 |
Parts Required:
Tools Required:
- 12 mm socket / ratchet and/or 12 mm wrench
Instructions:
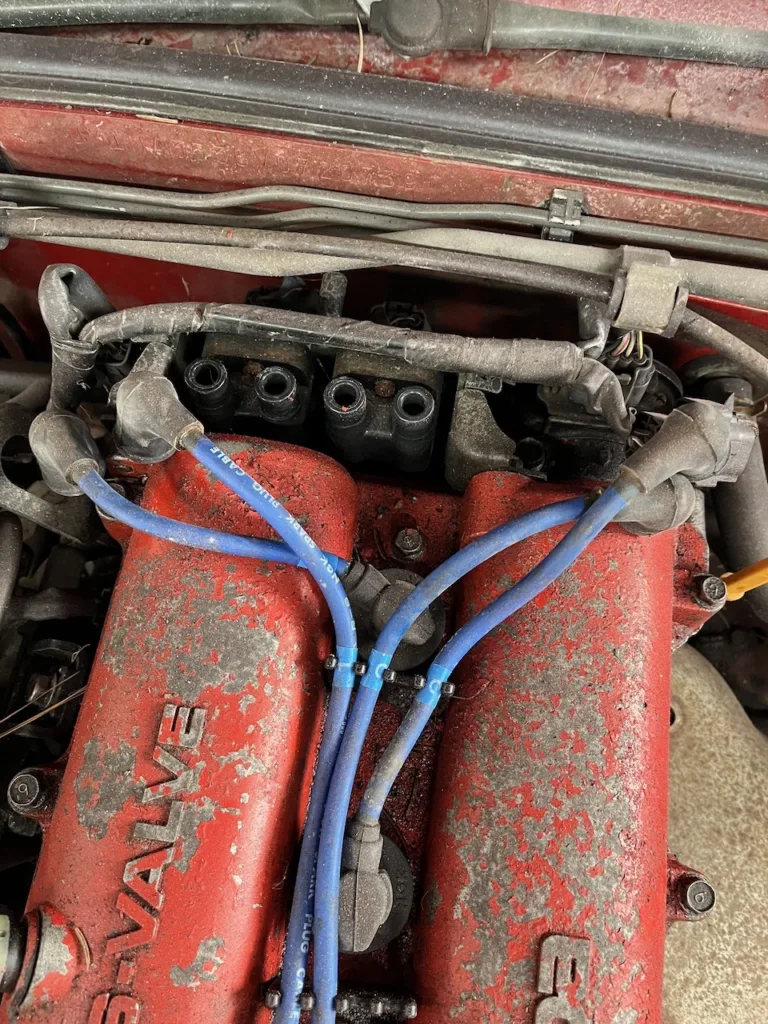
- Remove the spark plug wires by pulling them off of the ignition coil. Note the order of them when removing them – or see our guide here!
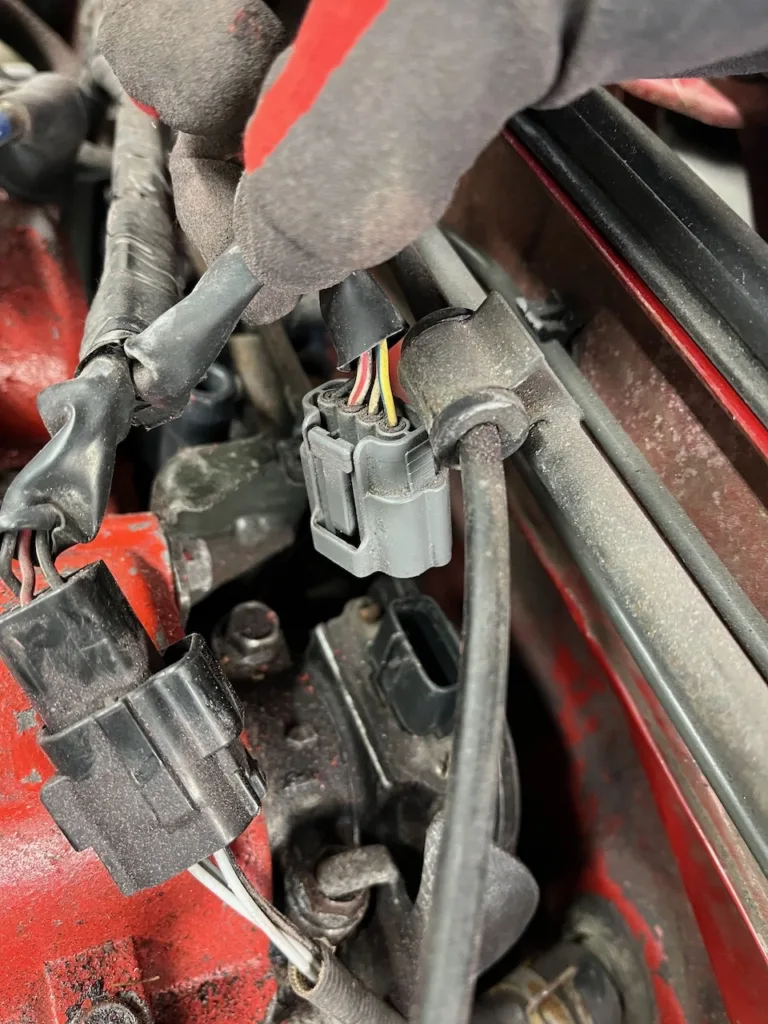
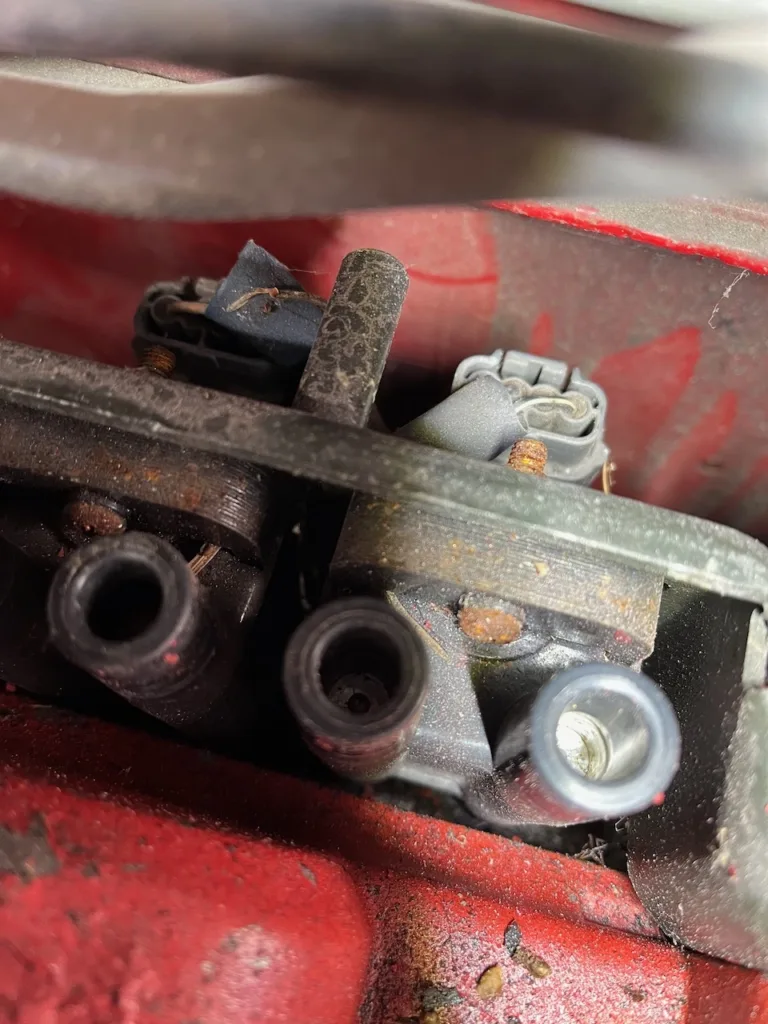
2. Unplug the electrical connectors for the oxygen sensor (shown on the left) and the Cam Angle Sensor (shown on the right), and unclip the harness from the ignition coil. With these disconnected, you can move this section of the wiring harness out of the way for more room. This is also a great time to replace your CAS O-ring if it is leaking.
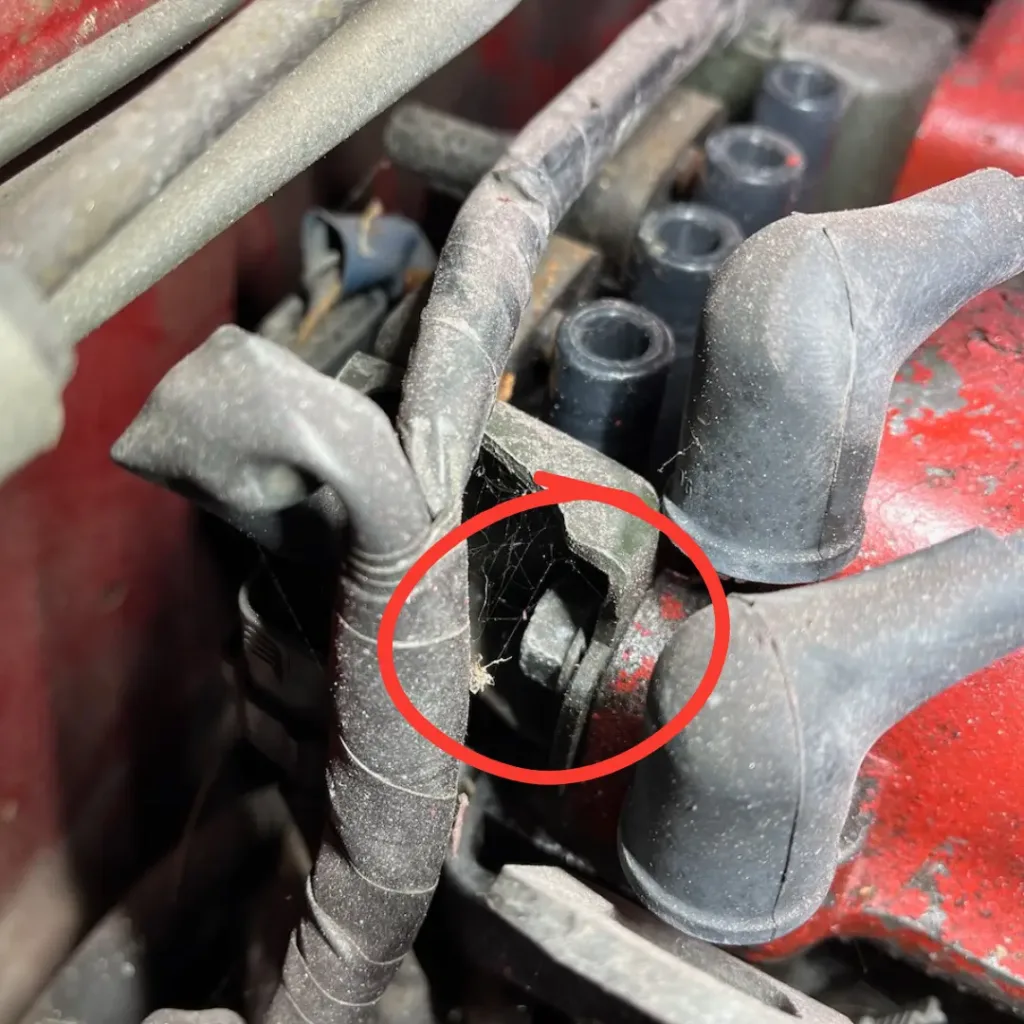
3. Remove the 2 12mm mounting bolts on either side of the ignition coil.
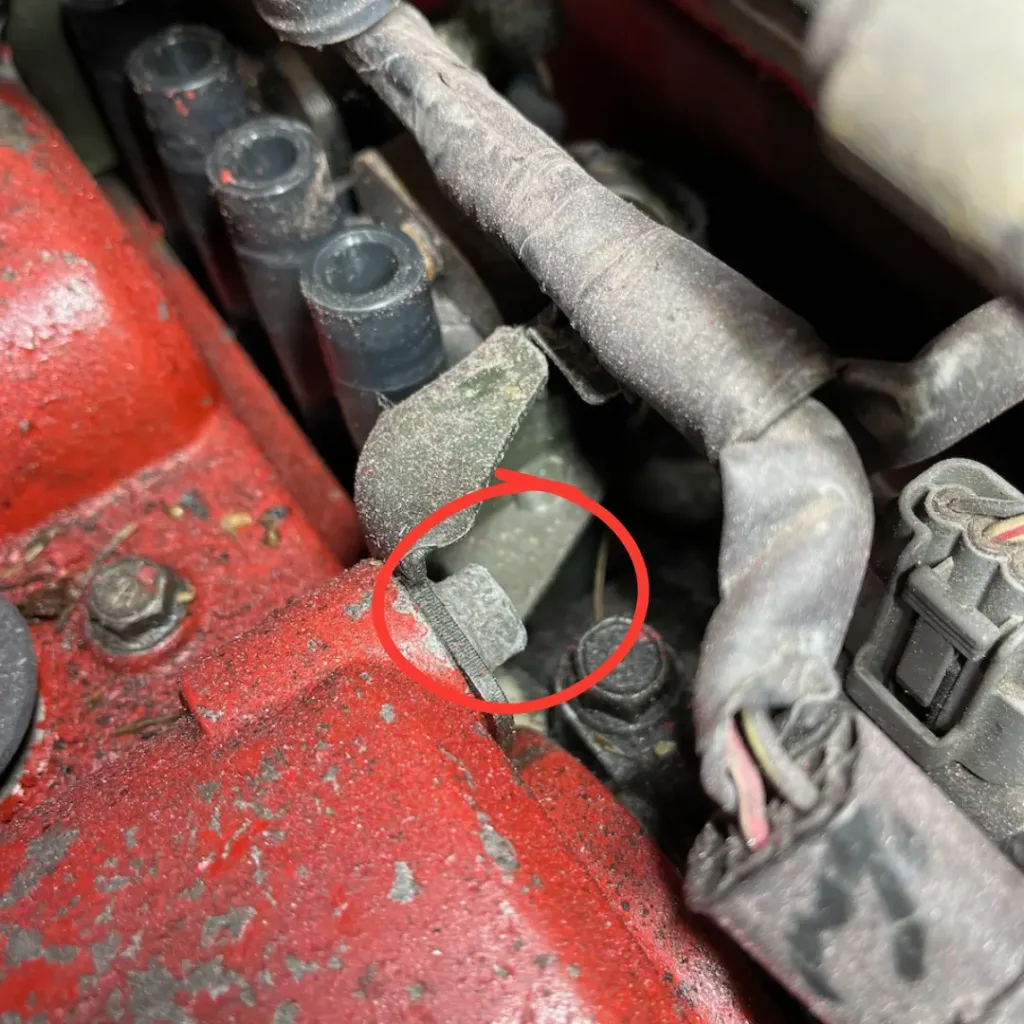
4. At this point you can remove the bottom 12 mm mounting bolt. This bolt is crammed between the back of the cylinder head and the firewall, and is almost impossible to photograph while in the car. However, if you reach your left hand behind the intake manifold and feel around for it, you should be able to locate it pretty easily.
5. With the coil unbolted, you should be able to pull it upward slightly and have better access to the 2 electrical connectors on the top of the unit. Squeeze the tabs to disconnect these plugs.
We hope that this guide has been helpful in walking you through the process of NA Miata ignition coil replacement. Check out our other NA Miata DIY guides here, and for more tips and tricks to keep you Miata running smoothly follow us on social media.